Landscaping Tips & Ideas for NH Seacoast Homeowners
Pro tips, plant guides, and design ideas from Derek Conrad, Certified in Home Horticulture and owner of Up North Scapes.

Landscaping Tips from a Certified Horticulturist
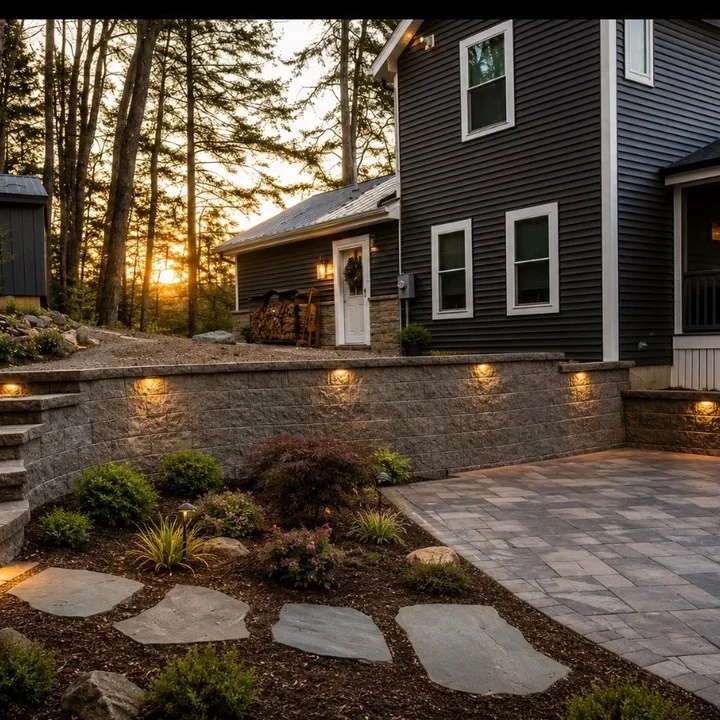
The Sun Sets Before Dinner Now. Is Your Yard Ready for It?
By the end of October the sun sets around 5:35 on the Seacoast. Nothing about the yard changed. The light did. Here is where that matters first.
Read More →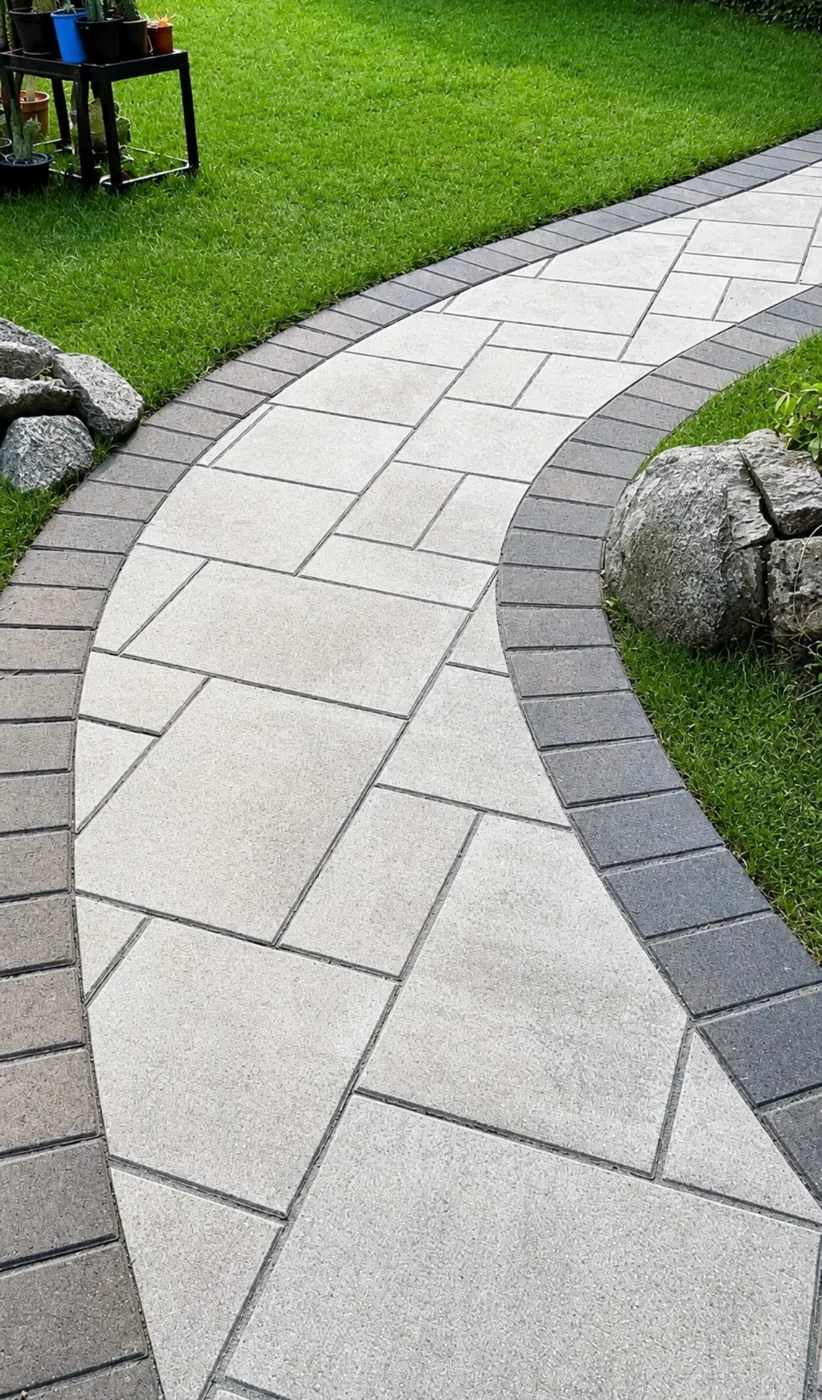
Why Your Walkway Heaves Every Winter (And What Actually Stops It)
A paver that catches your toe every March is not bad luck. New Hampshire ground moves every winter. The question is whether your walk was built to handle it.
Read More →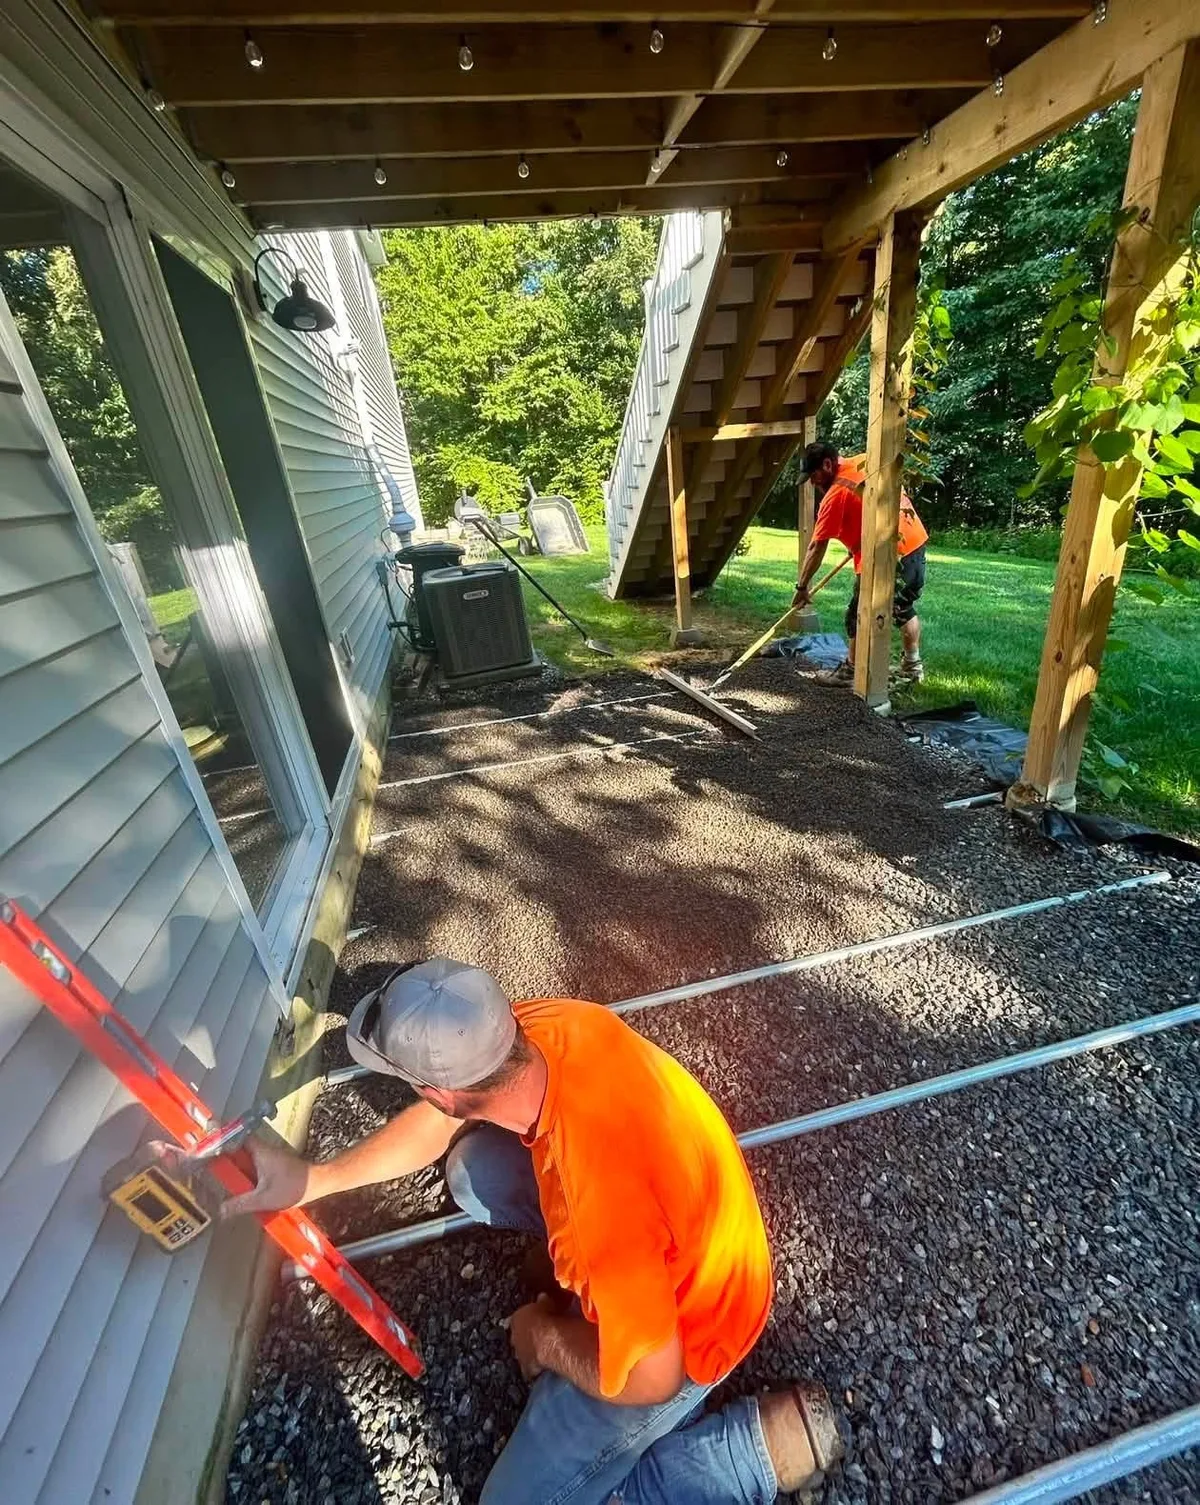
How We Prep the Ground Before Any Patio Goes In
Every great patio is decided before a single paver gets set. Here is what actually happens to your yard in the first two days of a build.
Read More →
Granite Steps vs. Concrete Steps: A Straight Comparison for NH Homes
Both will get you up to the front door. Only one of them still looks good in twenty years. Here is the real difference.
Read More →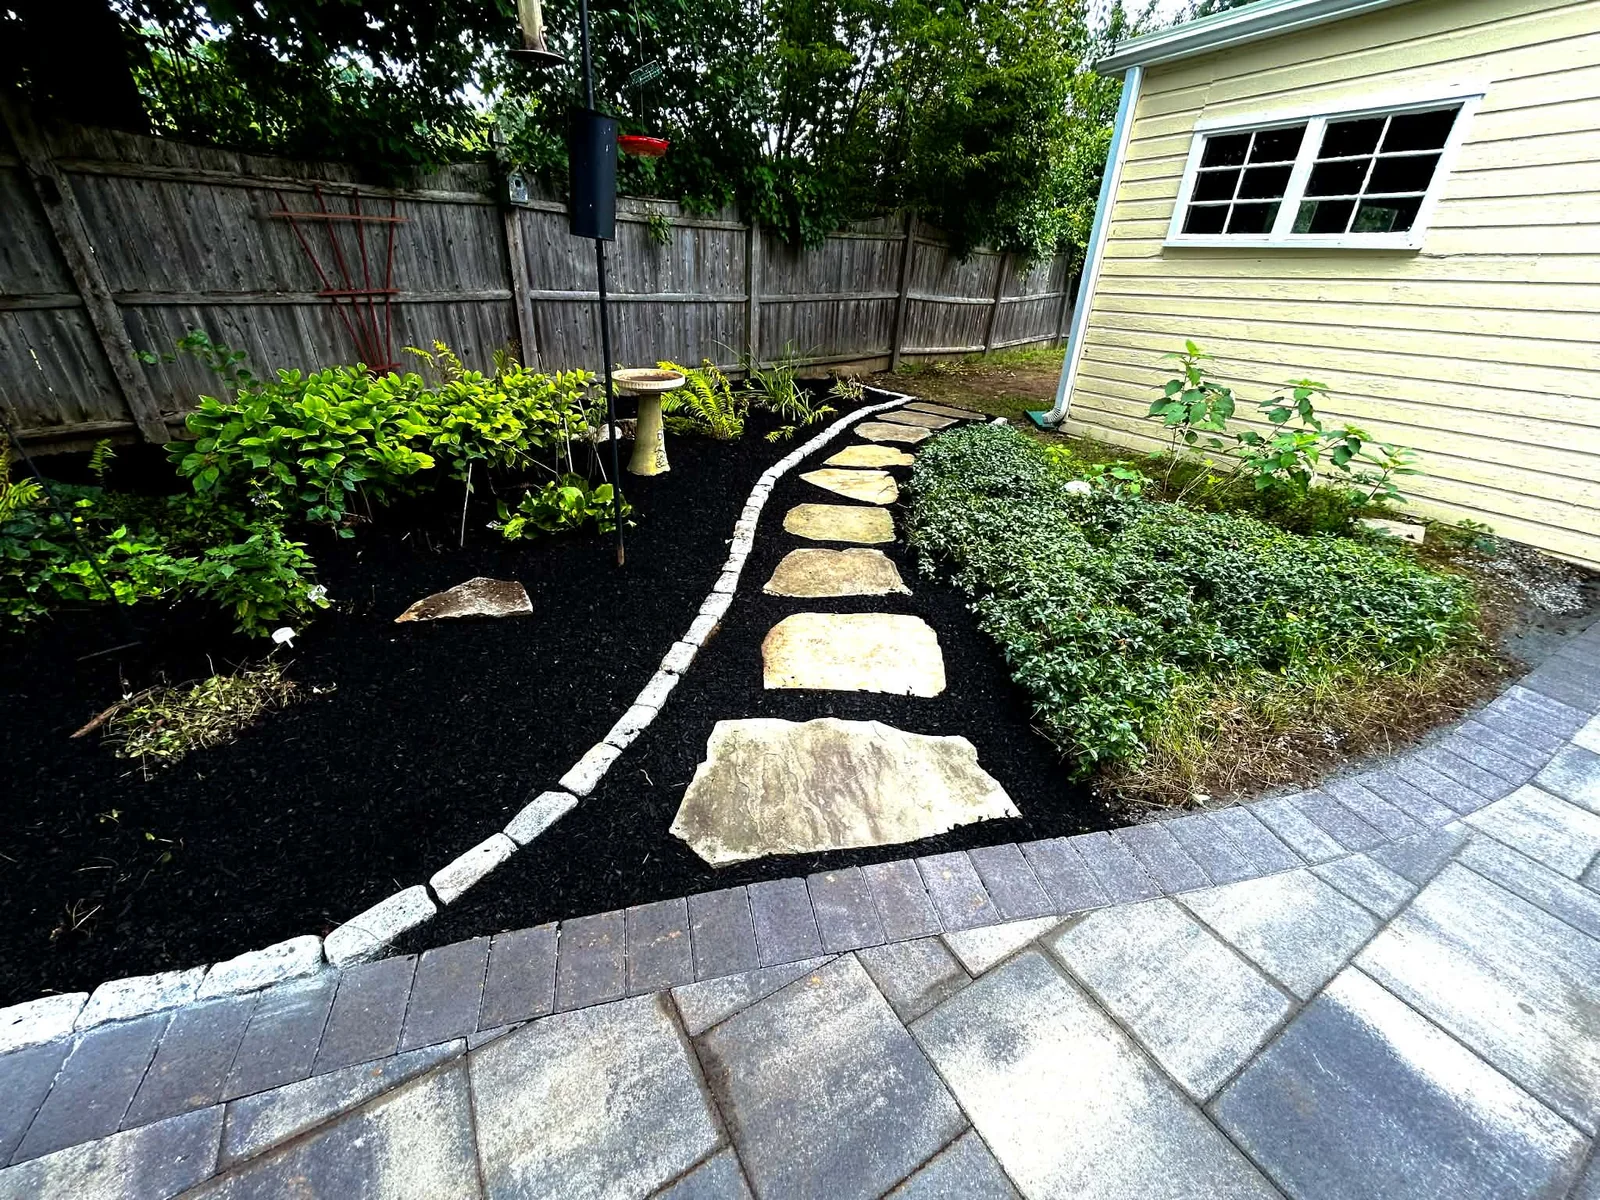
Fall Cleanup Done Right: What to Cut Back, What to Leave Standing
A good fall cleanup is not about stripping the yard bare. Here is what actually needs to go, what should stay for winter, and why it sets up your whole spring.
Read More →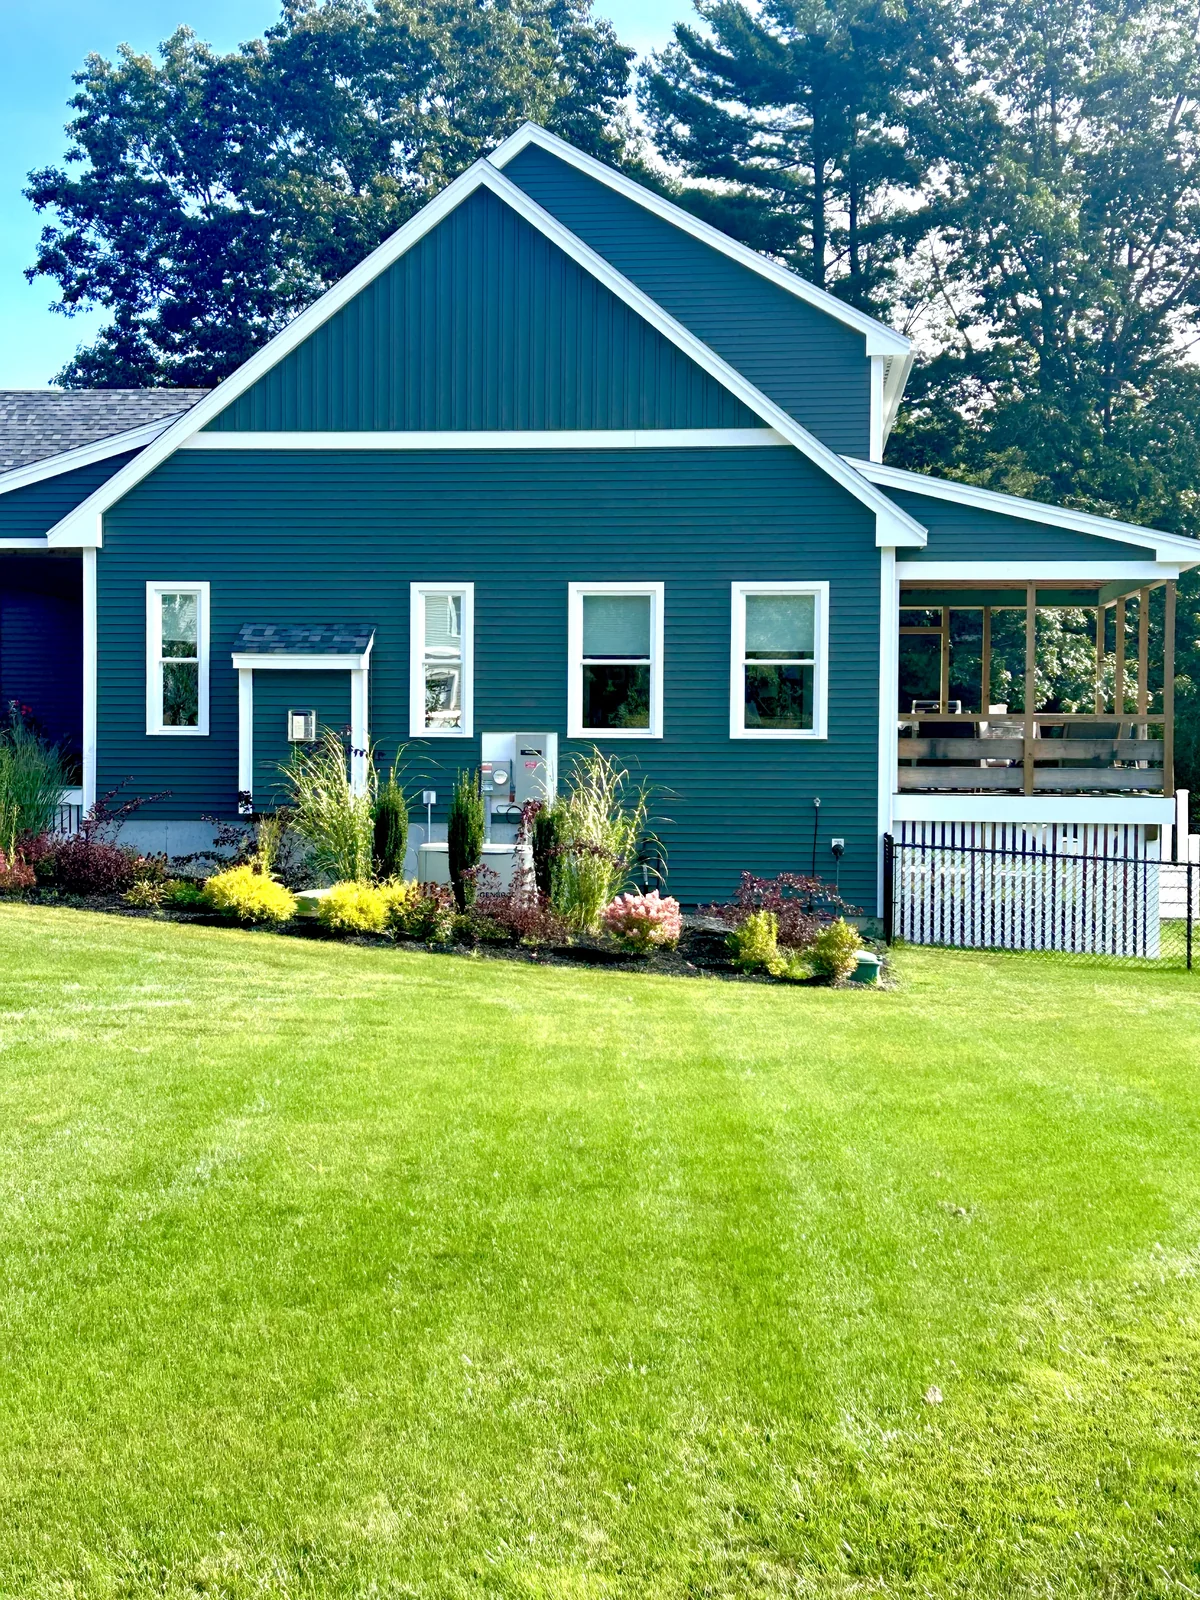
Fall Is for Planting: Why Trees and Shrubs Go In Best in September and October
Spring gets all the credit, but fall is when the pros plant. Here is why autumn-planted trees and shrubs come out ahead, and the one deadline that matters.
Read More →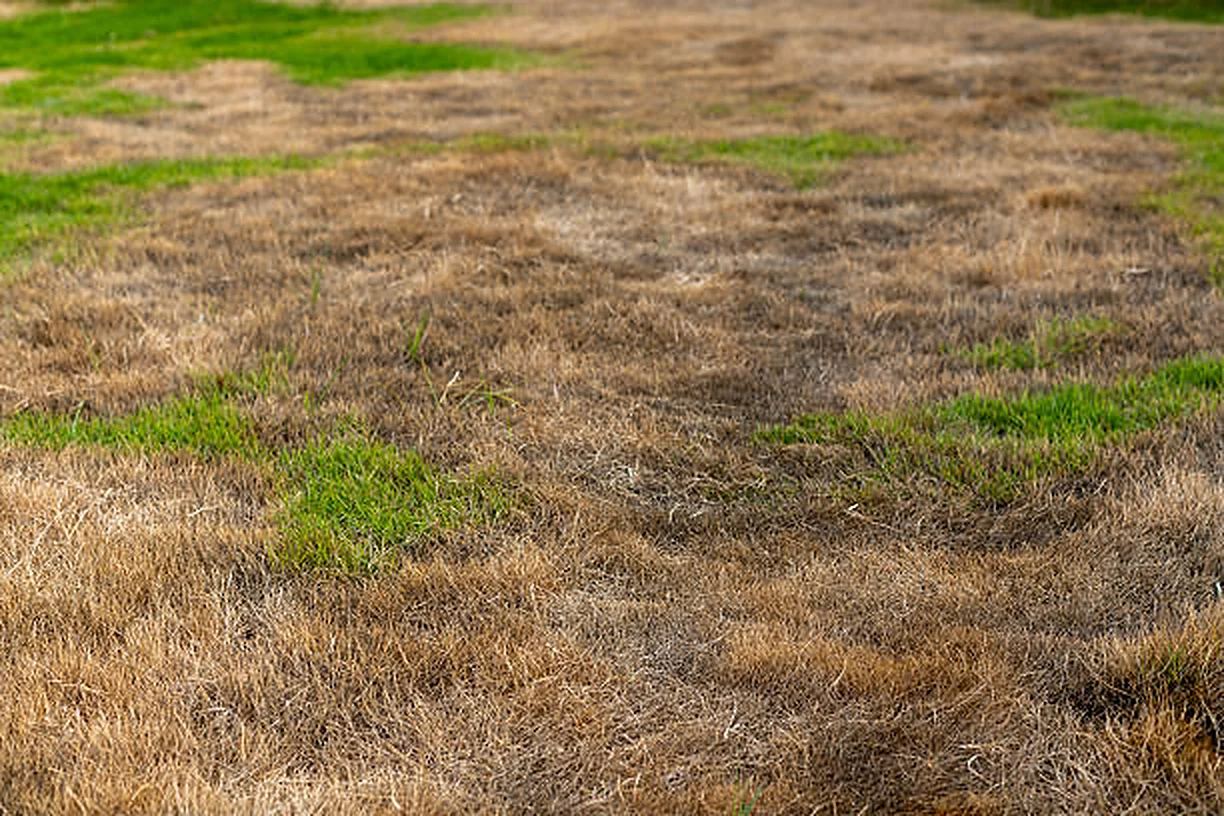
Something Tearing Up Your Lawn at Night? It Is Probably Grubs
Skunks and raccoons do not dig up healthy lawns. If your turf is getting shredded in August, the real problem is living underneath it.
Read More →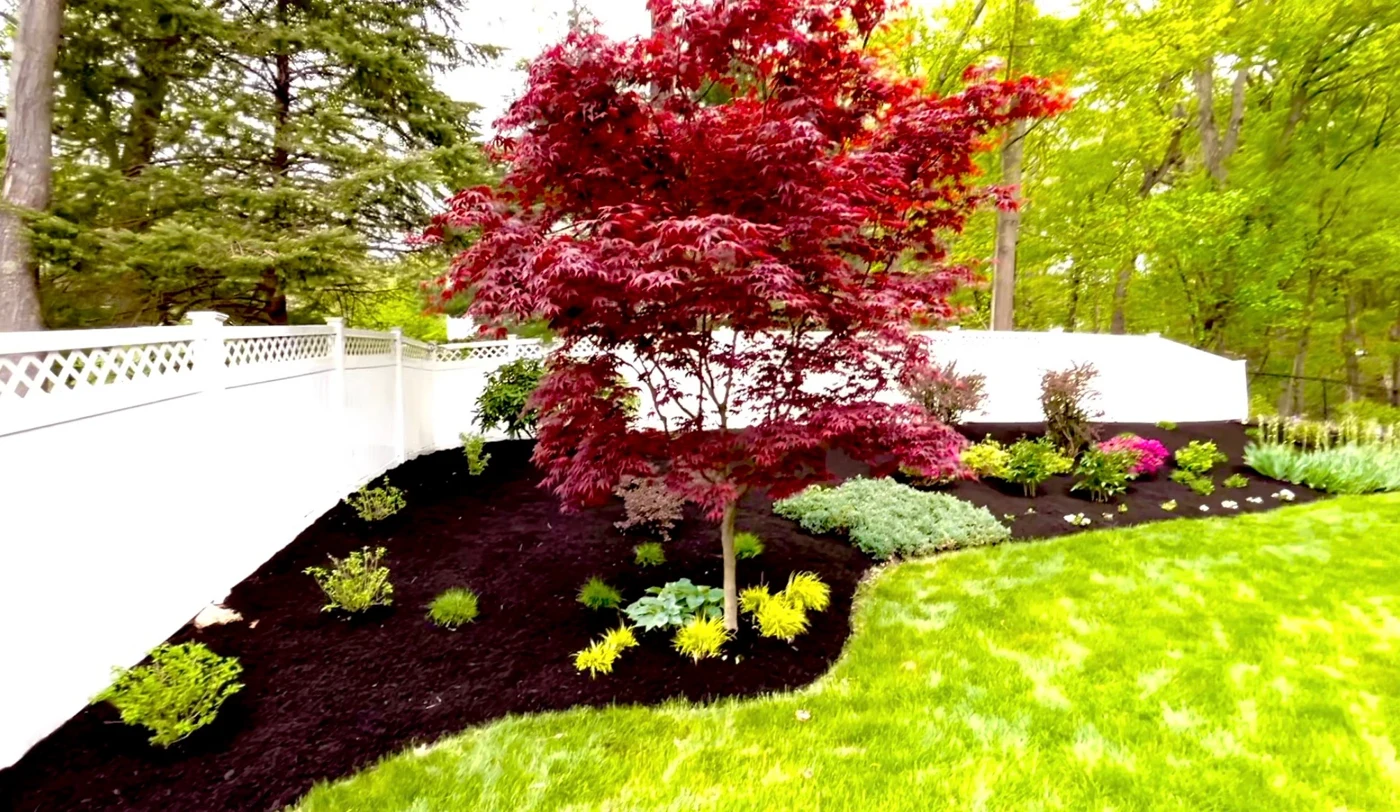
The Right Way to Mulch (And the Mistake That Kills Trees)
Mulch is one of the best things you can do for a bed, and one of the most common ways to slowly kill a tree. The difference is about four inches.
Read More →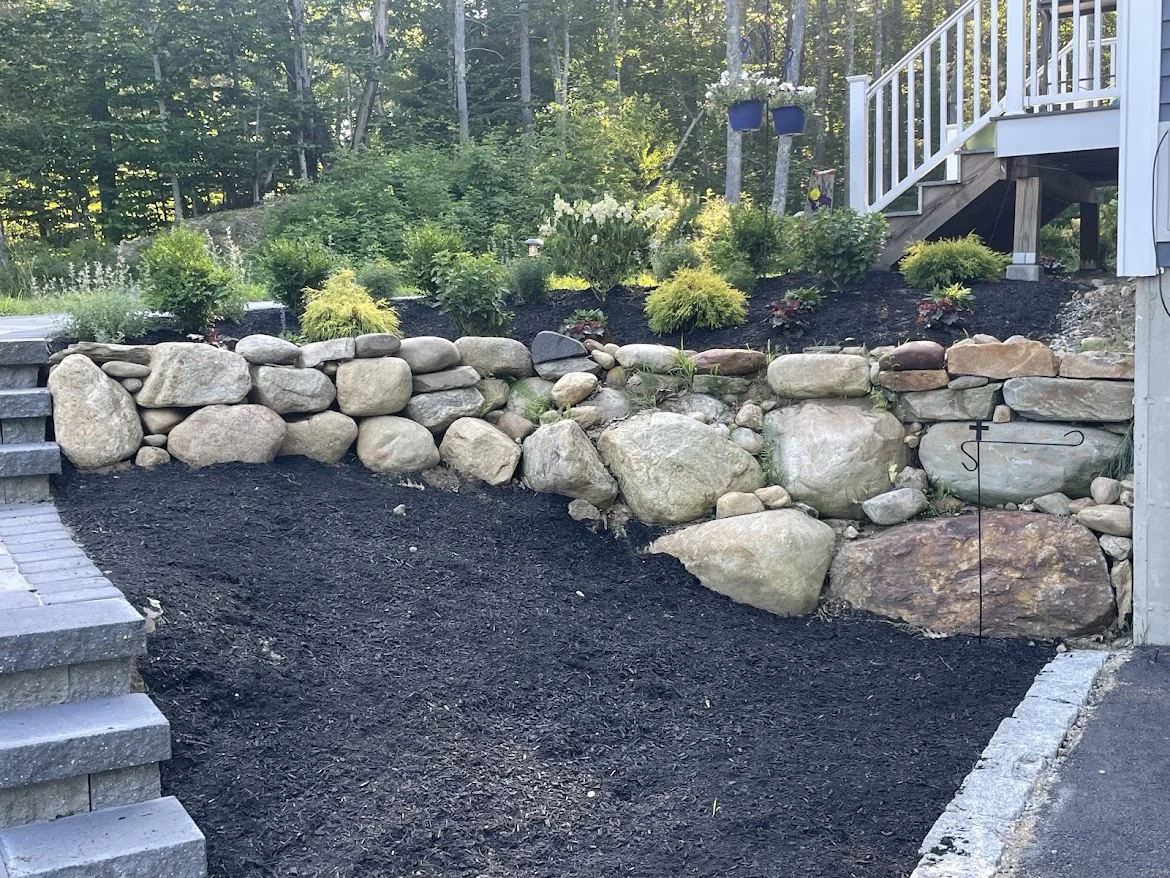
5 Warning Signs Your Retaining Wall Is Failing (And What to Do About It)
Retaining walls fail slowly, then all at once. Here are the five signs to catch early, and how to tell a repair job from a rebuild.
Read More →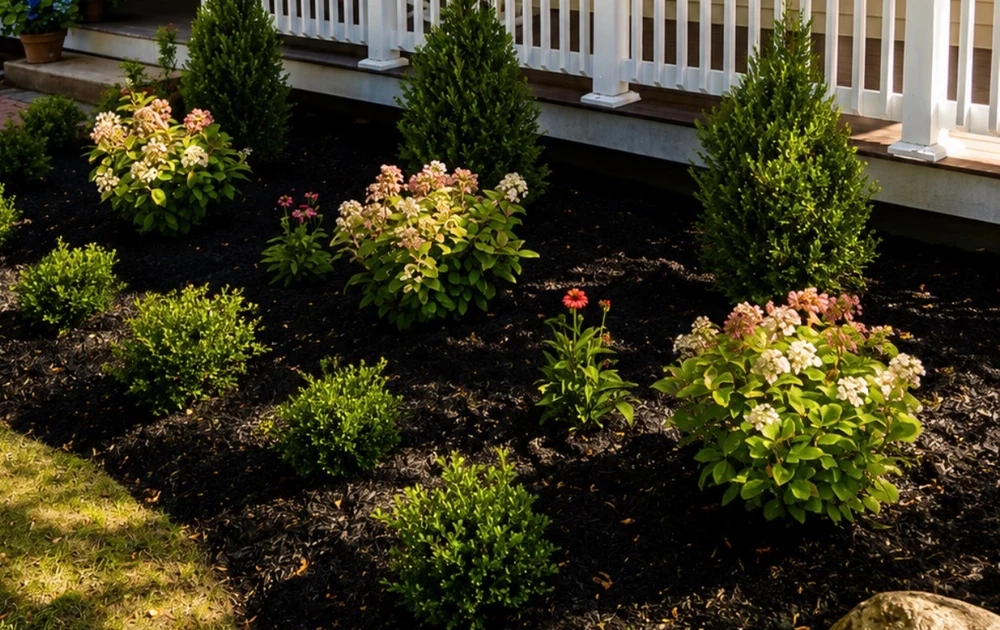
Why Your Hydrangeas Are Not Blooming (And How to Fix It for Next Year)
Big healthy leaves and zero flowers is the most common hydrangea complaint in NH. It almost always comes down to one of four fixable causes.
Read More →
Why Fall Is the Best Time to Build Your Patio, Fire Pit, or Retaining Wall
Everyone calls in spring. The smart ones book in fall. Here is why the best backyards on the Seacoast get built between September and November.
Read More →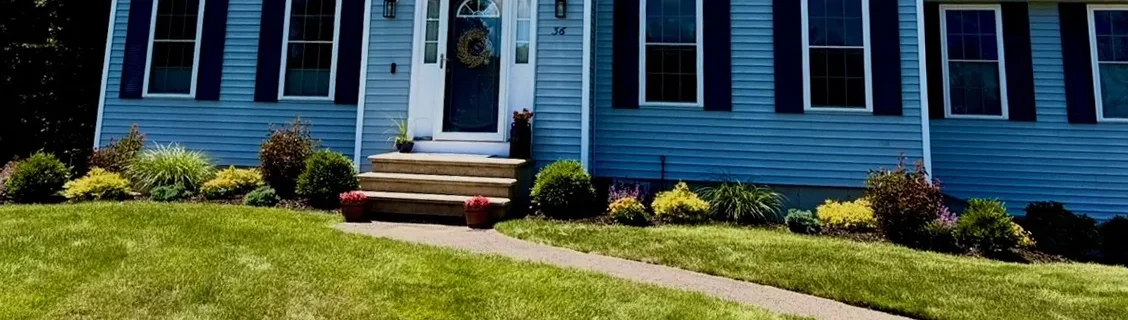
August Lawn Rescue: Bringing a Heat-Stressed Lawn Back Before Fall
Brown patches in August do not mean your lawn is dead. Here is how to tell, what to stop doing, and why the next few weeks are the best repair window of the year.
Read More →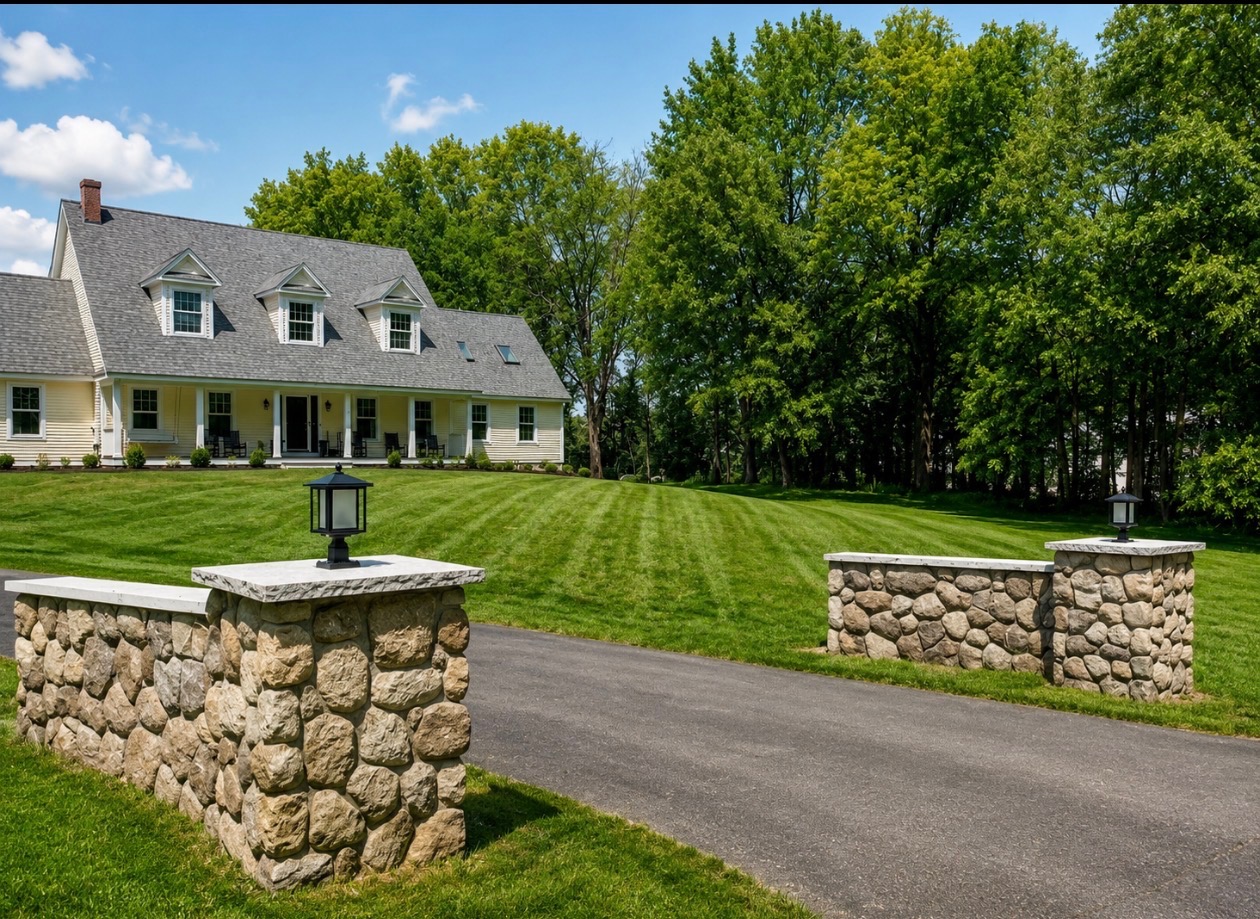
How to Design an Outdoor Living Space From Scratch
Real backyard design starts with how you actually plan to use the space, not a features list.
Read More →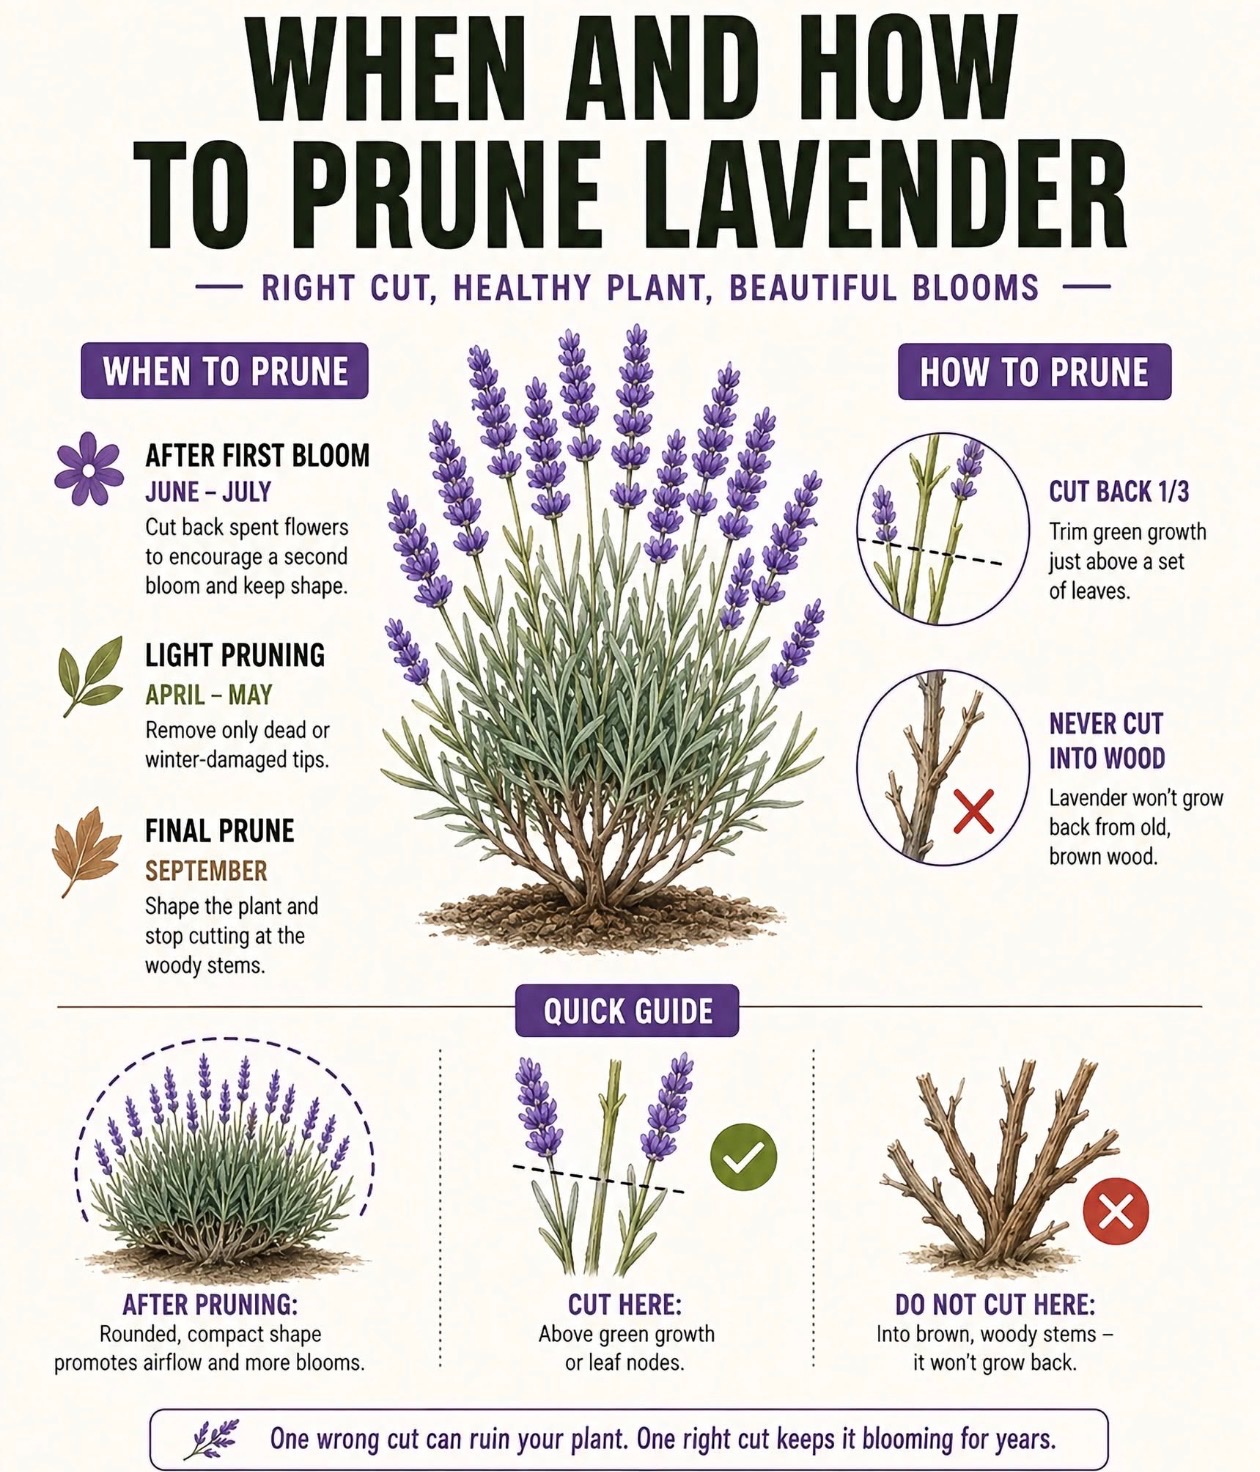
When and How to Prune Lavender: The Right Cut for Healthy Blooms
A wrong cut can set a lavender plant back for good. Here is when to prune and the one cut to always avoid.
Read More →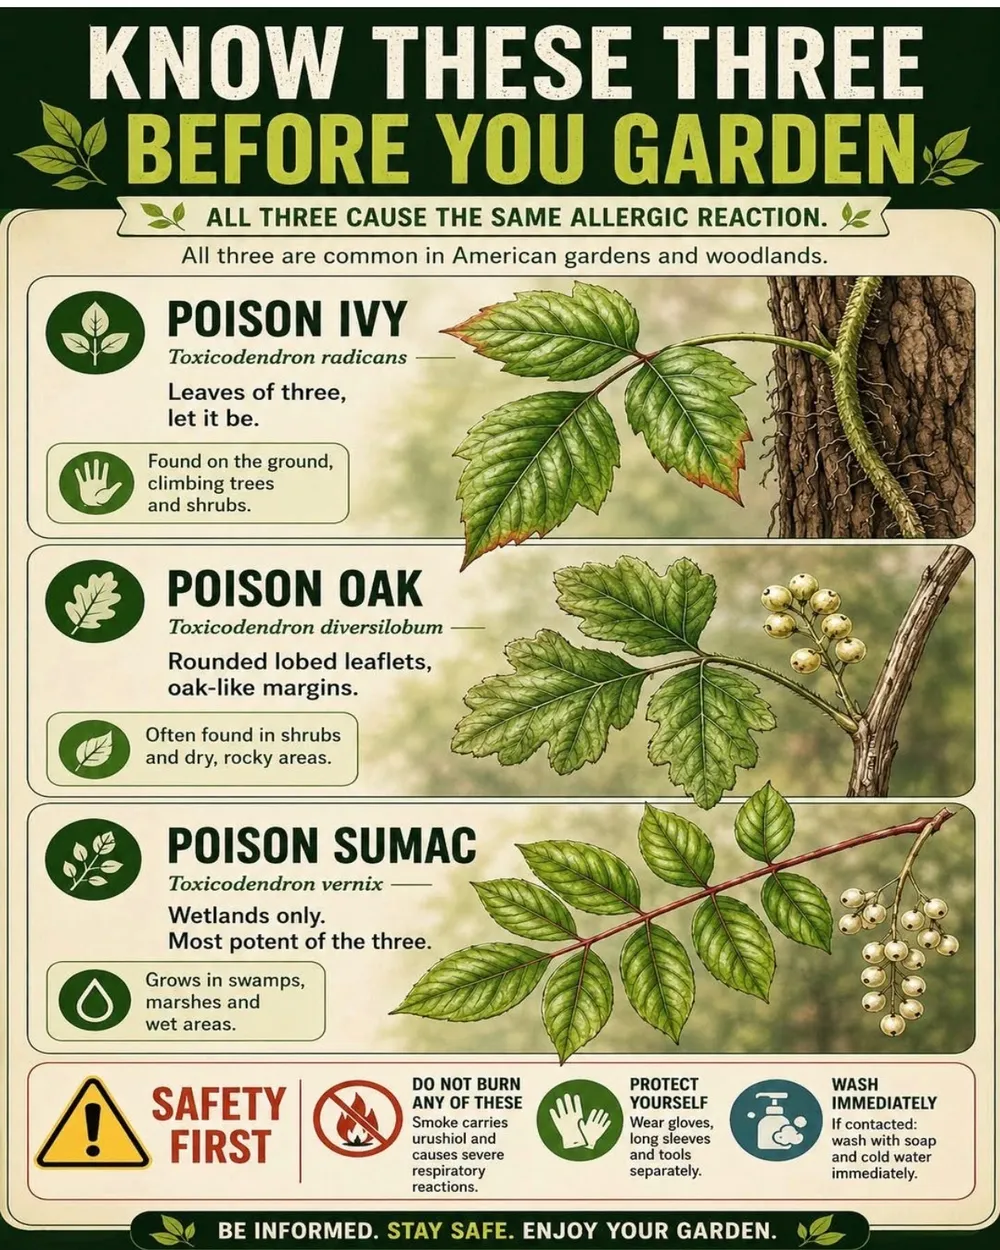
Poison Ivy, Poison Oak, and Poison Sumac: What Every NH Yard Owner Should Know
All three cause the same reaction and all three show up in Seacoast yards. Here is how to tell them apart before you start clearing.
Read More →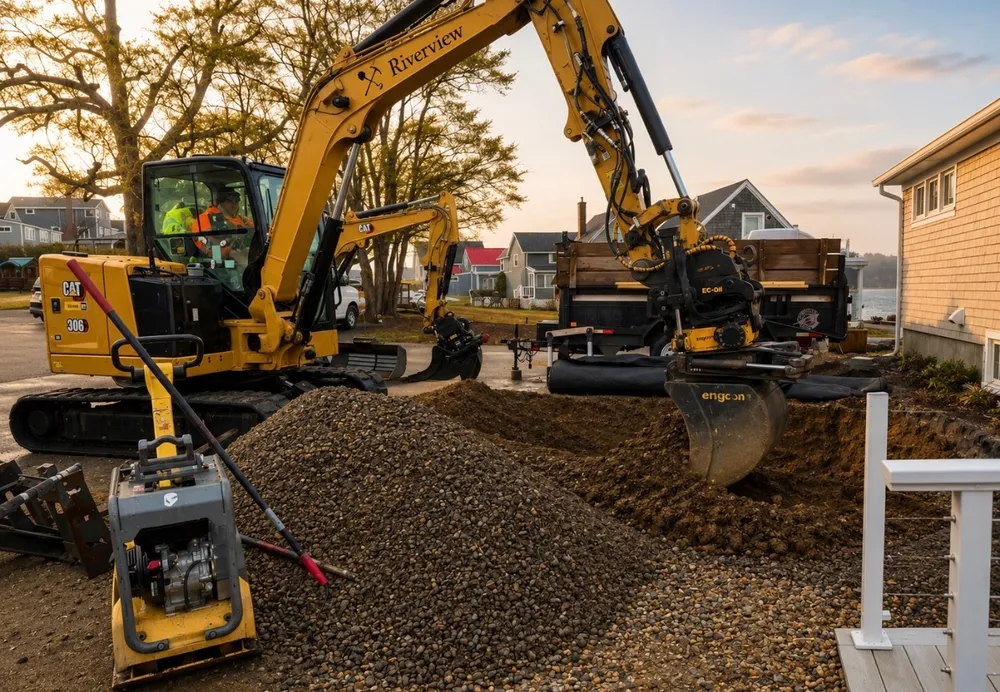
How Poor Drainage Damages Your Landscape and Foundation
Standing water after a storm is not just an eyesore. Here is what it actually does to your yard and foundation over time.
Read More →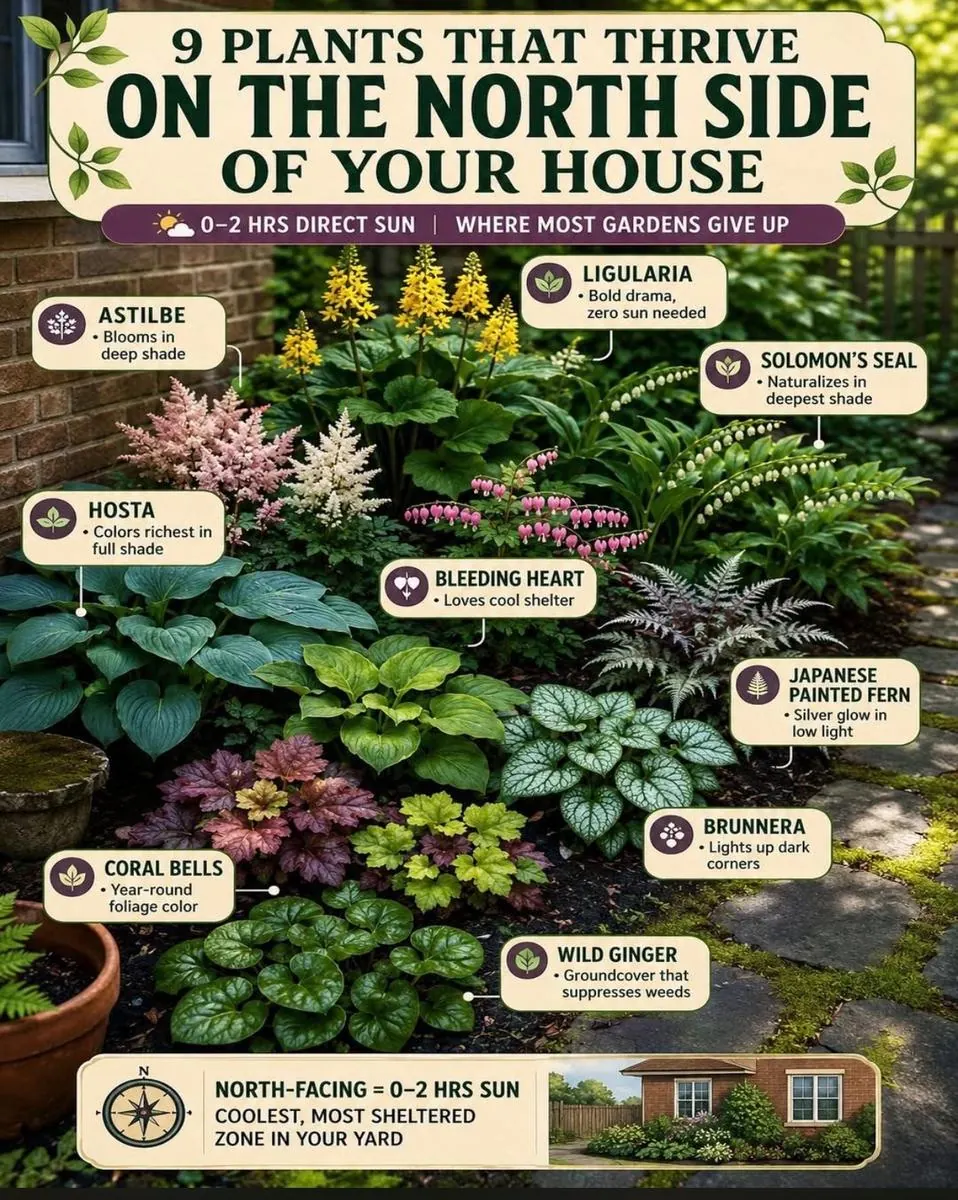
9 Plants That Thrive on the North Side of Your House
The shadiest spot in your yard does not have to be the worst looking one. These plants are built for low light and they deliver all season.
Read More →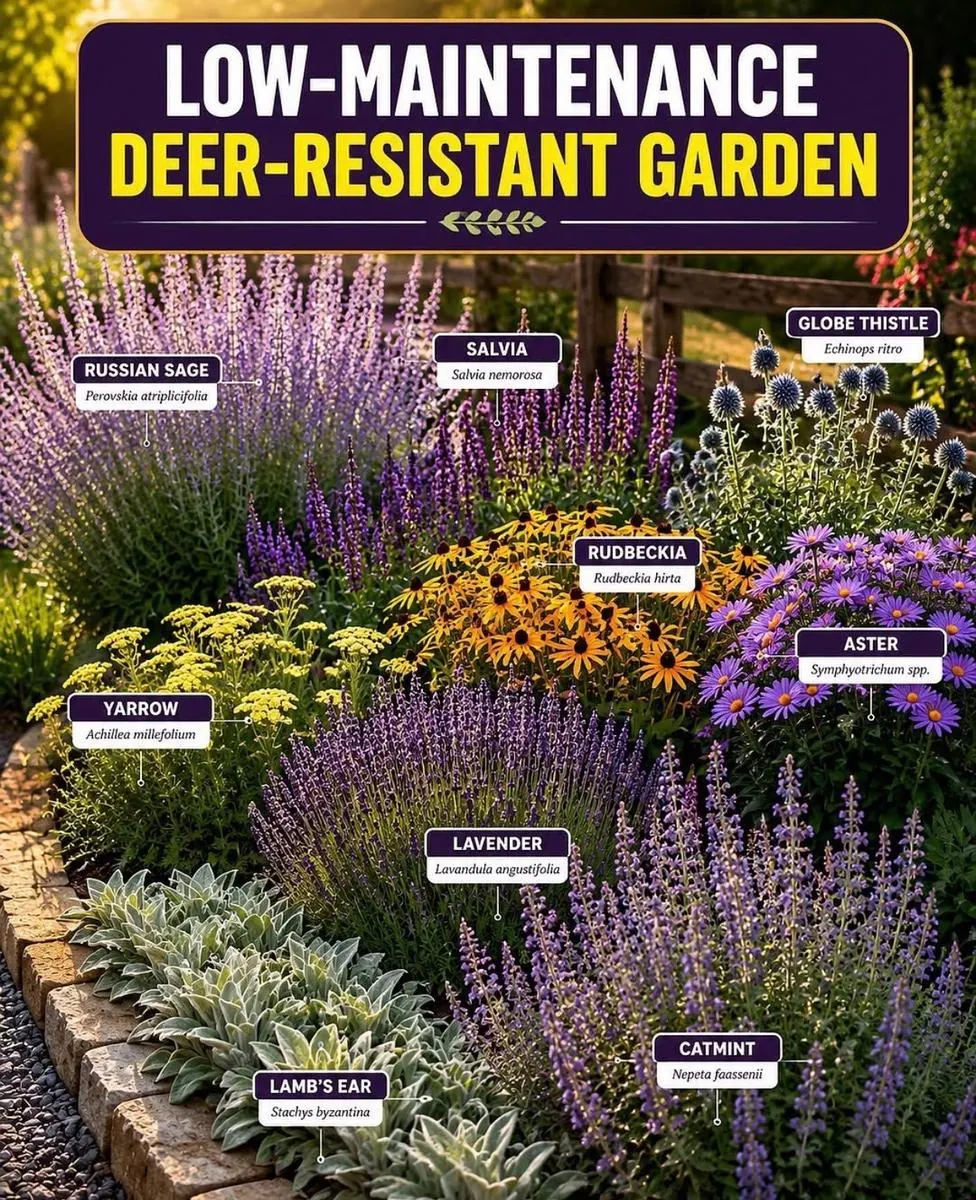
Building a Low-Maintenance Deer-Resistant Garden in New Hampshire
Deer pressure is a real problem across the NH Seacoast. The right plant choices make the difference between a bed that holds up and one that gets eaten every season.
Read More →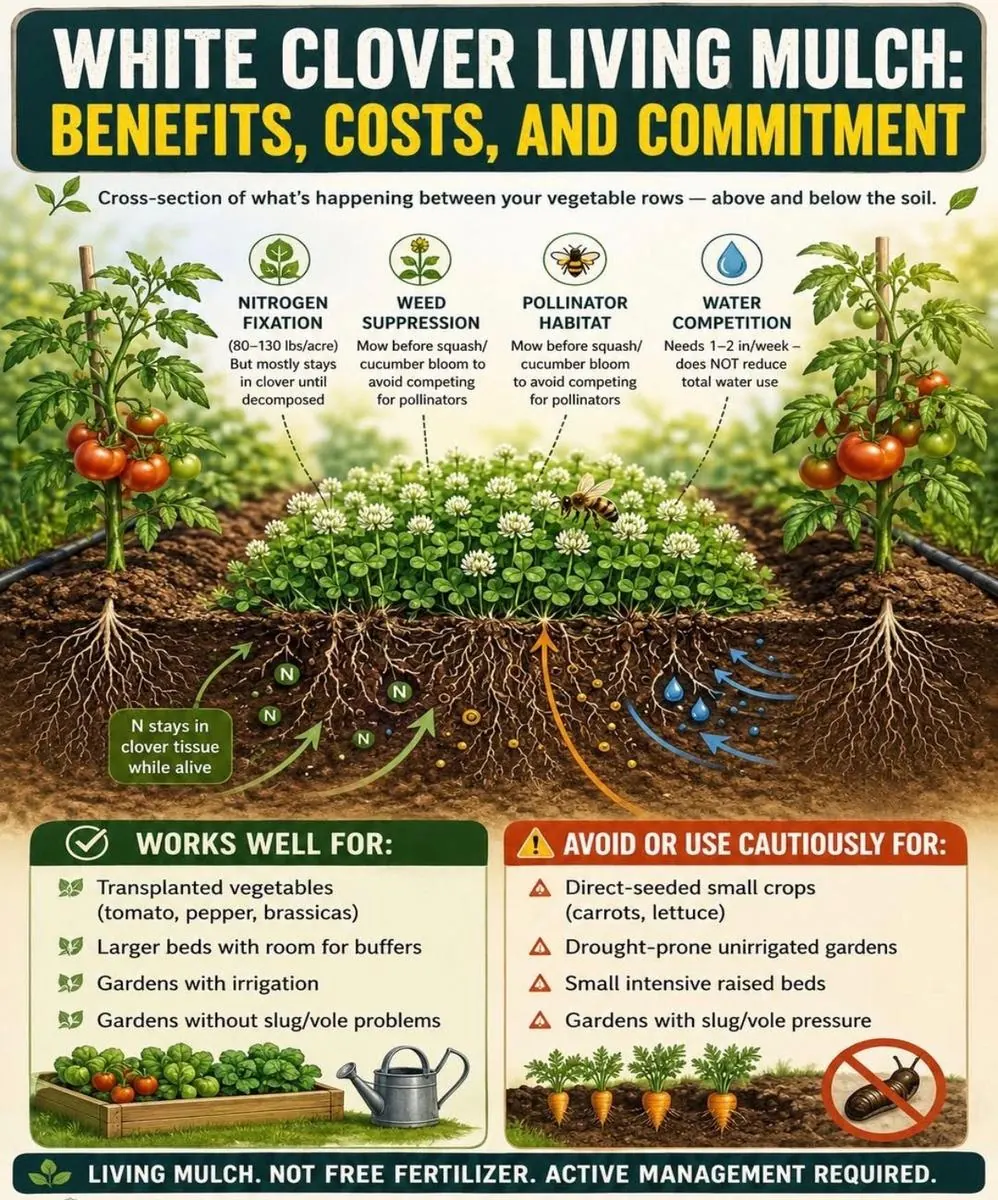
White Clover as Living Mulch: What It Does and What It Does Not Do
White clover between your beds sounds like a low-effort win. Here is what it actually delivers and where it falls short.
Read More →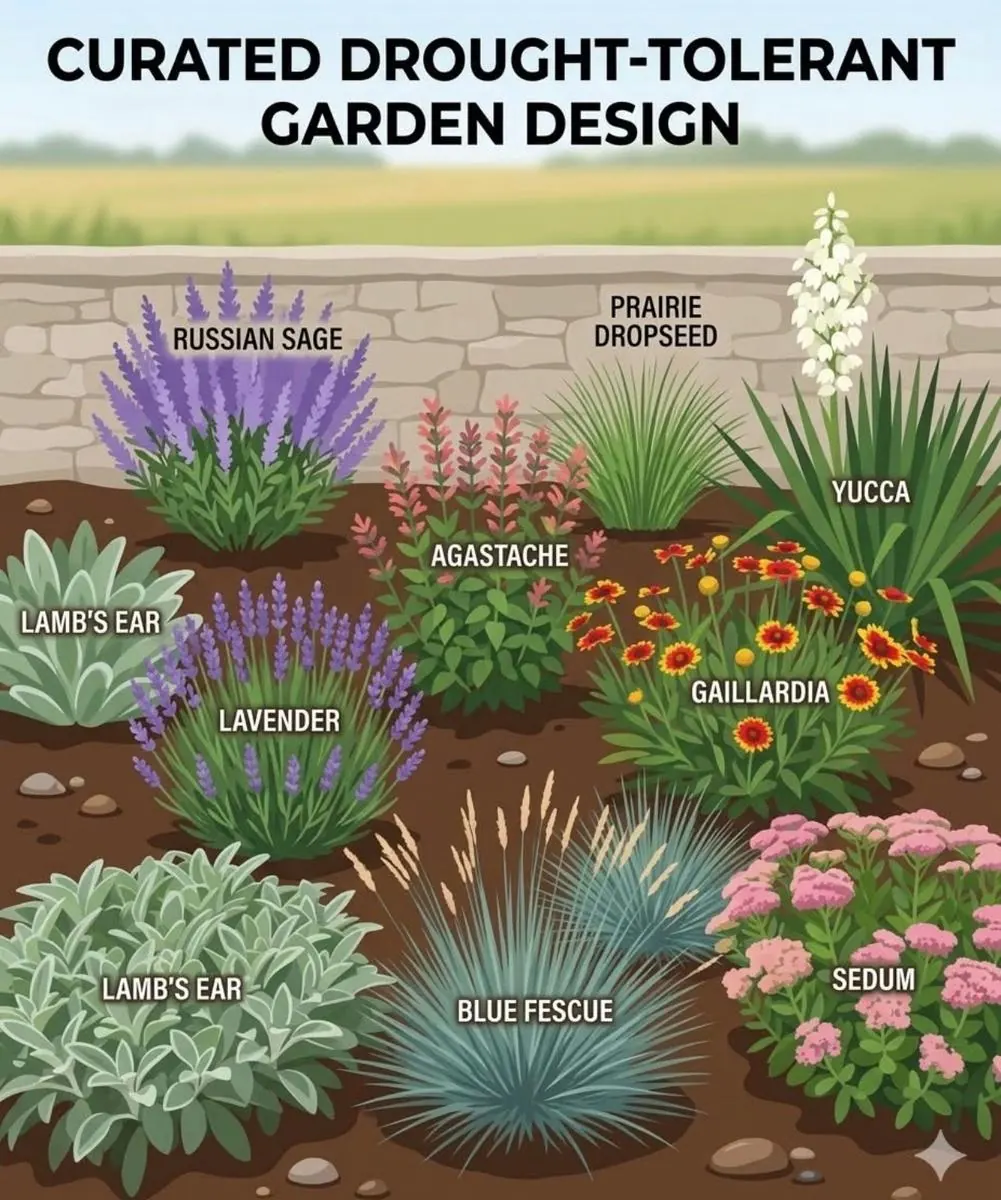
Drought-Tolerant Garden Design That Actually Works in New Hampshire
Dry summers are becoming more common in the Seacoast. These plants hold up without constant watering and still look sharp all season.
Read More →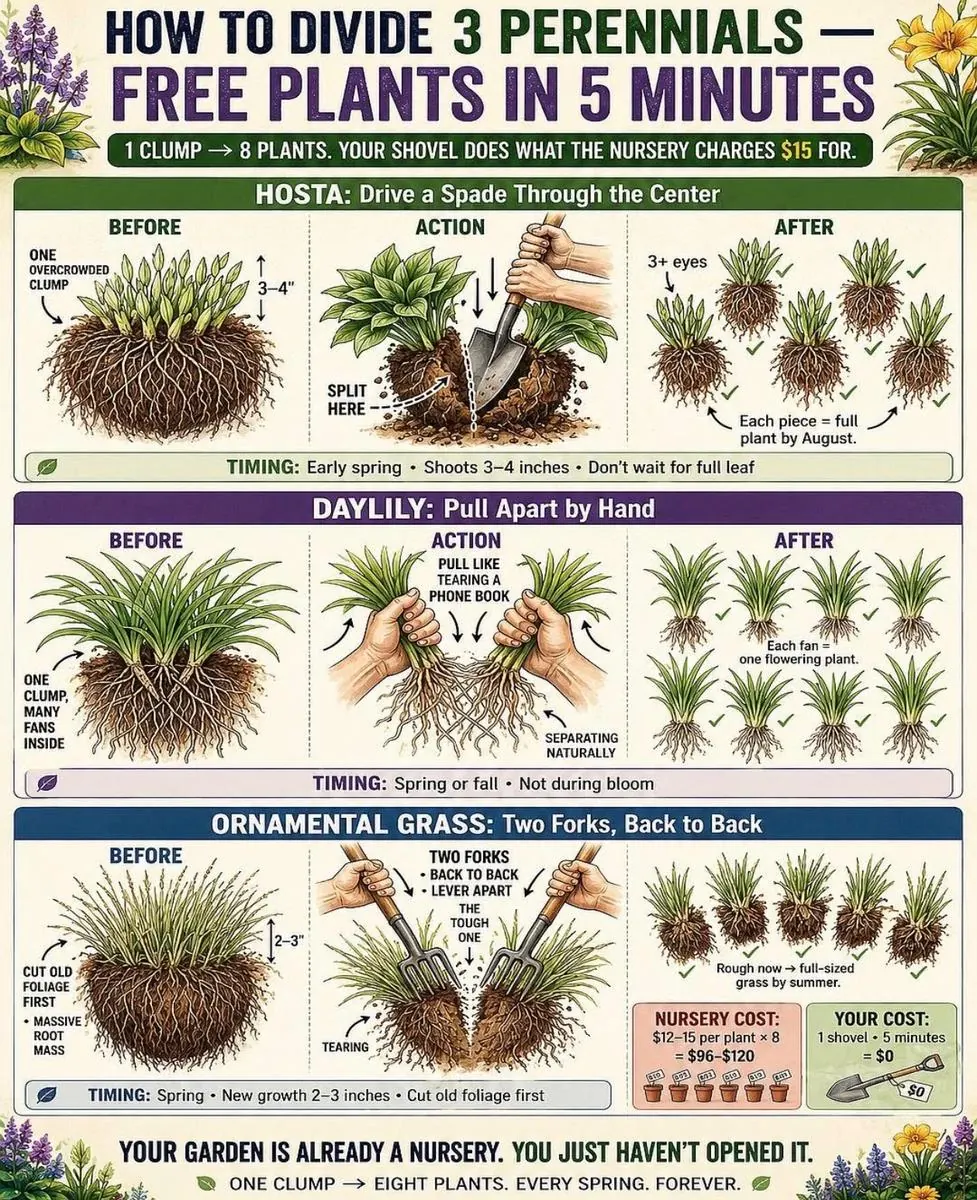
How to Divide Perennials and Get More Plants for Free
One clump becomes eight plants in five minutes. Here is how to divide Hostas, Daylilies, and Ornamental Grasses the right way.
Read More →
9 Plants That Need Little to No Pruning
Smart plant selection means less maintenance. These species thrive in New England with minimal upkeep year after year.
Read More →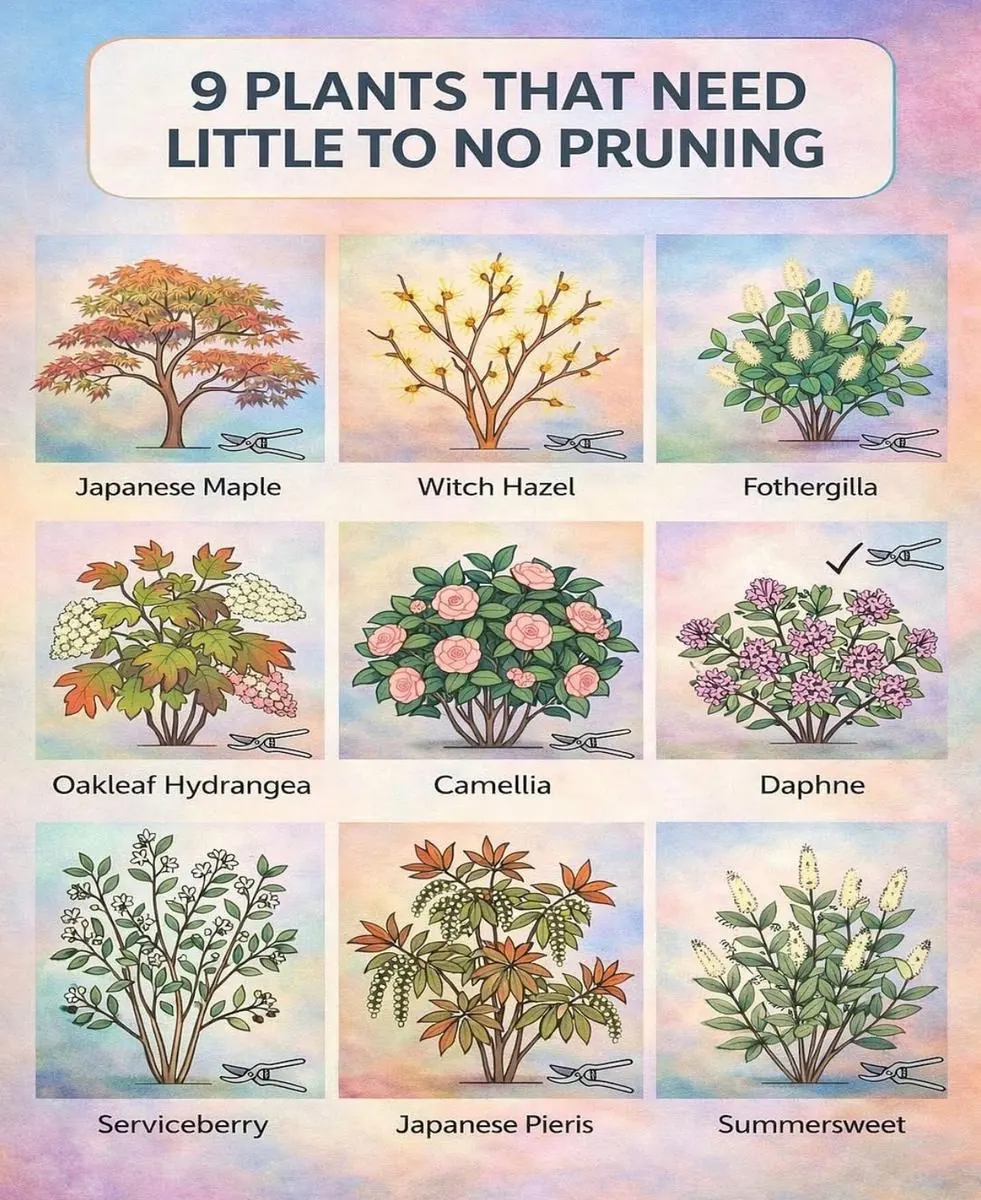
Bee Friendly Flowers for Your NH Landscape
Pollinator-friendly plantings add color and life to your yard while supporting the local ecosystem.
Read More →
Best Watering Practices for New Plantings in NH
Getting watering right in the first season makes the difference between plantings that thrive and ones that do not make it through winter.
Read More →
How to Maintain Your Paver Patio Through NH Winters
A professionally installed patio is built to last, but it benefits from a little care going into and out of winter.
Read More →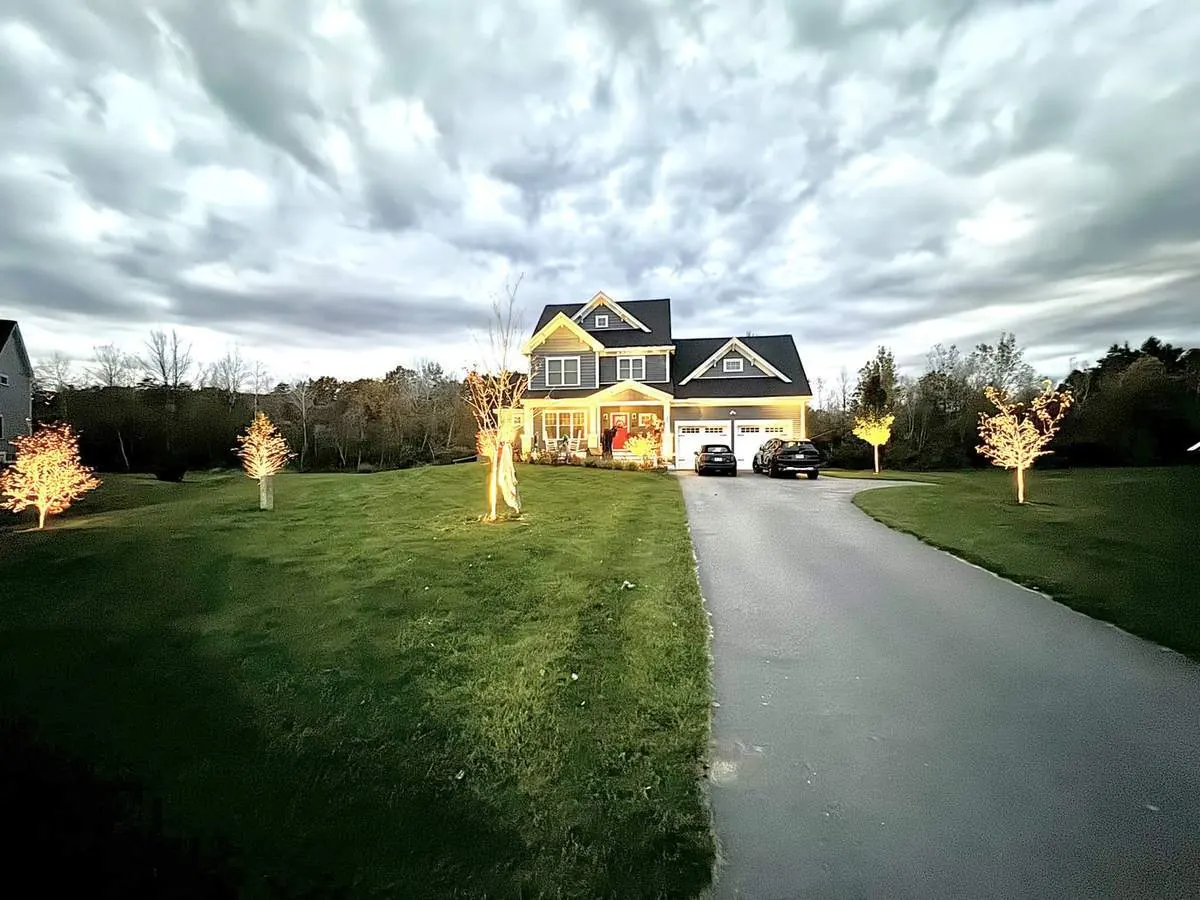
Why Landscape Lighting Adds More Value Than You Think
Most homeowners think of lighting as a luxury. The reality is it is one of the highest return improvements you can make.
Read More →Why Fall Is the Best Time to Build Your Patio, Fire Pit, or Retaining Wall
Every spring the phone rings off the hook, the schedule fills, and half the people calling end up waiting until July for a patio they wanted in May. Fall works the opposite way. It is the single best window of the year to build, and almost nobody takes advantage of it.
Fall Ground Conditions Are Ideal
Cooler temperatures and drier ground are exactly what excavation and hardscape work want. Spring soil on the Seacoast is saturated with snowmelt and rain, which slows compaction and makes a mess of your yard. September and October ground is stable, workable, and easier on the rest of your property.
Your Lawn and Plantings Barely Notice
By fall, your lawn and beds are heading into dormancy. Equipment traffic and staging that would scar a June lawn is healed by the time anything wakes up in April. Winter does the recovery work for you.
It Is Ready the Day Summer Starts
A patio or fire pit built in October has all winter for the base to settle and prove itself. When the first warm weekend hits in May, you are hosting on it, not waiting on a contractor to return your call with everyone else in town.
The Booking Window Is Now
Fall builds get scheduled in August and early September, before the ground freezes and the season closes out. Once the calendar is full, it is full until spring. If you have been thinking about a patio, a fire pit, a retaining wall, or lighting, this is the moment to get on the schedule.
August Lawn Rescue: Bringing a Heat-Stressed Lawn Back Before Fall
By early August, most lawns on the Seacoast look rough. Brown patches, thin spots, crunchy grass. The good news: most of that grass is dormant, not dead, and the best lawn repair window of the entire year is about to open.
Dormant or Dead? The Tug Test
Grab a handful of brown grass and pull. If it resists, the crowns are alive and the lawn is dormant. It will green back up when temperatures drop and rain returns. If it pulls up with no resistance, that section is gone and will need seed.
Stop Doing These Three Things
First, stop mowing short. Set the deck at three inches or higher, because taller grass shades its own roots. Second, stop light daily watering. It trains shallow roots. One deep soak once or twice a week does more. Third, do not fertilize a stressed lawn in the heat. Pushing growth now burns it further.
The Real Fix Happens Mid-August to Mid-September
This is the one true overseeding window in New Hampshire. Warm soil germinates seed fast, cooler nights keep seedlings alive, and weeds are done for the year. Spring seeding fights crabgrass and gets cooked by summer. Fall seeding wins almost every time.
How to Do It Right
Core aerate first so seed lands in soil, not thatch. Overseed with a quality northern mix, top with a light layer of compost, and keep it consistently damp for two to three weeks. By October you will have new grass established and ready to survive winter.
When to Start Over Instead
If more than half the lawn failed, patching is throwing money at it. A renovation, or replacing struggling turf areas with beds, borders, or hardscape that never browns out, is often the smarter long-term play.
Why Your Hydrangeas Are Not Blooming (And How to Fix It for Next Year)
A hydrangea covered in healthy green leaves with no flowers on it is the single most common plant complaint we hear in August. It is almost never a mystery. It is one of four causes, and every one of them is fixable.
You Pruned at the Wrong Time
Bigleaf hydrangeas, the classic blue and pink mopheads, bloom on old wood. The buds for next summer form this fall on this year's stems. Cut those stems back in fall or spring and you cut off every flower before it existed. If you pruned your mophead and got no blooms, this is your answer. Only prune these right after they flower, and only what needs it.
Winter Killed the Buds
Even unpruned, bigleaf hydrangea buds sit exposed all winter, and Seacoast winters take them out regularly. The plant survives, the flowers do not. You can protect them with burlap and leaf mulch, or plant varieties that do not have this problem at all.
You Have the Wrong Variety for New Hampshire
Panicle hydrangeas like Limelight and Quick Fire, and smooth hydrangeas like Annabelle, bloom on new wood. Winter cannot touch next year's flowers because they form in spring. They bloom reliably here every single year. If you are tired of gambling, this is the fix.
Too Much Shade or Too Much Nitrogen
Hydrangeas in deep shade put out leaves and skip flowers, and lawn fertilizer drifting into beds does the same thing. Morning sun with afternoon shade is the sweet spot, and keep the high-nitrogen turf products on the turf.
What to Do Right Now
Nothing drastic. Do not prune in August. Note which type you have, let it stand through winter, and plan the fix for the right season. Fall is a great time to add new-wood varieties that will bloom their first summer.
How to Design an Outdoor Living Space From Scratch
Most backyard design conversations start with a features list. A fire pit, a bigger patio, maybe an outdoor kitchen. The actual design work starts one step earlier than that, with how the space gets used day to day, because that decision is what everything else gets built around.
Start With How You'll Use It
A backyard built for hosting large groups needs a different footprint than one built for a quiet space to sit after work. Families with young kids need sightlines to the play area. A yard that hosts twenty people on the Fourth of July needs circulation space that a couple entertaining six people does not. This is the question we ask before a single material gets chosen.
Build the Bones First
The patio or hardscape footprint goes in first, because everything else in a backyard design gets built around it rather than the other way around. This is also where drainage and grading get handled, since a beautiful patio on a poorly graded base is a problem waiting for the next hard rain, not a finished project.
Layer In Lighting and Plantings
Once the hardscape footprint is set, lighting and plantings are what make a space feel finished instead of just built. A patio at noon and the same patio lit at dusk with the plantings filled in are two different experiences of the same yard. This is usually the phase homeowners underestimate and end up happiest with once it's done.
The Backyard Designs We Build Most Often on the Seacoast
A patio paired with a fire feature is the most requested combination we see, followed closely by a patio and outdoor kitchen for households that entertain often. Sloped Seacoast lots tend toward a tiered retaining wall system with plantings worked into each level, turning a yard that was hard to use into one with actual usable space at every elevation.
5 Warning Signs Your Retaining Wall Is Failing (And What to Do About It)
A retaining wall is holding back thousands of pounds of soil and water every day. When one fails, it fails slowly at first, then all at once, and the all-at-once part usually happens in spring when the ground is saturated. Late summer is the right time to look at yours honestly.
1. Leaning or Bulging
Stand at the end of the wall and sight down its face. Any lean or belly means the soil behind it is winning. This does not correct itself, it only accelerates.
2. Cracks and Separation
Stair-step cracking in block walls, gaps opening between stones or timbers, or the wall pulling away from steps and structures all point to movement in the base or pressure the wall was never built to handle.
3. Water Pouring Over or Through
After a storm, water should exit through designed drainage, not cascade over the top or shoot through the face. Uncontrolled water is what actually destroys walls. The soil pressure is the symptom, water is the cause.
4. Soil Washing Out Behind the Wall
Sinkholes, settling, or low spots forming above and behind the wall mean material is escaping through it. Whatever is above that area, patio, lawn, driveway, is slowly losing its support.
5. It Was Built Without Drainage
Plenty of older walls went in with no gravel backfill, no fabric, and no drain pipe. They were failing from day one, just slowly. If your wall predates you and you have never seen a drain outlet, assume there is not one.
Repair or Rebuild?
Caught early, drainage correction and partial resets can save a wall. A wall that is leaning, bulging, and losing soil is past that point, and rebuilding it correctly, with proper base, backfill, and drainage, is the only way to stop a slow failure from becoming a full collapse. Fall is the ideal season for wall work: dry ground, dormant plantings, and a finished wall that is proven before spring melt hits it.
The Right Way to Mulch (And the Mistake That Kills Trees)
Done right, mulch holds moisture, evens out soil temperature, suppresses weeds, and feeds the soil as it breaks down. Done wrong, it slowly kills the exact plants it is supposed to protect. The difference comes down to depth and placement.
The Mulch Volcano Problem
Drive through any NH neighborhood and you will see them: cones of mulch piled a foot high against tree trunks. Bark is not root tissue. Bury it and it stays wet, softens, and starts to rot. Insects and disease move in, roots start circling inside the pile instead of spreading out, and the tree declines over years. By the time it looks sick, the damage is done underground.
The Right Depth
Two to three inches, no more. Deeper than that and water and air stop reaching the soil. If last year's layer is still there, rake it loose and top up lightly instead of piling a fresh full layer on top.
The Doughnut, Not the Volcano
Keep mulch pulled back three to six inches from trunks and stems so the root flare, the spot where the trunk widens into the ground, stays visible and dry. The shape you want around a tree is a flat doughnut with the trunk in the hole, not a volcano with the trunk in the middle.
What Kind of Mulch
For planting beds, a natural bark or shredded hardwood mulch breaks down into the soil and improves it year over year. Dyed mulches hold color longer but feed the soil less. Stone lasts the longest but heats up in summer and gives the soil nothing back, so it belongs in the right spot, not every spot.
When to Mulch
Late spring and fall are both good windows. A fall top-up insulates roots through winter, which matters most for anything planted this year.
The Five Minute Check
Walk your beds this week. If you cannot see the root flare at the base of your trees, pull the mulch back until you can. It is the fastest favor you can do a tree, and it costs nothing.
Something Tearing Up Your Lawn at Night? It Is Probably Grubs
If you woke up to patches of lawn flipped over like someone took a rake to it at 2 AM, you have visitors. Skunks, raccoons, and crows tear up turf for one reason: there is a buffet of grubs living underneath it. The digging is annoying. The grubs are the actual problem.
What Grubs Are
Grubs are beetle larvae, mostly Japanese beetles and European chafers here, and they spend late summer just under the surface eating grass roots. The beetles you saw on your plants in July laid the eggs. August is when the hatch starts feeding.
The Two Tests
First, the carpet test: grab a section of damaged turf and pull. If it peels back like a rug with no roots holding it, grubs have eaten the roots out from under it. Second, count them: peel back one square foot and look. A handful of grubs is normal and healthy. Ten or more per square foot is an infestation doing real damage.
Why Timing Matters
Right now, in late August and September, grubs are small, close to the surface, and vulnerable. This is the window where treatment actually works. By October they burrow deep for winter, and by next June they are big, tough, and nearly done feeding anyway.
Fix the Lawn, Not Just the Grubs
Treatment stops the damage, but the chewed-up areas will not repair themselves. The grub window and the fall overseeding window are the same window: treat, rake out the dead material, aerate, and seed. The lawn goes into winter repaired instead of wrecked.
If It Happens Every Year
Chronic grub damage usually means a lawn that is thin, cut too short, and watered too lightly, which is exactly what beetles look for when choosing where to lay eggs. A thicker, deeper-rooted lawn is the long-term defense.
Why Your Walkway Heaves Every Winter (And What Actually Stops It)
If your front walk has a paver that catches your toe every March, or a slab that sits an inch higher than its neighbor by spring, you are not imagining it and it is not bad luck. New Hampshire ground moves every winter. The question is only whether your walkway was built to move with it or fight it.
What Frost Heave Actually Is
Water in the soil freezes and expands. In the Seacoast that happens dozens of times a winter, not once. Every freeze pushes up, every thaw drops back, and anything sitting on wet soil rides that elevator all season. By April the pavers that started level are wherever the ground left them.
The Real Cause Is Under the Walk
Most heaving walkways were set on a couple of inches of sand over native soil. Native soil holds water. Water freezes. The walk lifts. A walkway built on eight to ten inches of compacted crushed stone drains instead of holding water, so there is far less to freeze and far less movement to fight.
Drainage Is the Other Half
A walk that catches roof runoff, sits in a low spot, or has no grade away from the house is soaking the exact soil that heaves. Grading and drainage handled first, before a single paver goes in, is what keeps the base dry enough to hold still.
Pick the Right Ice Melt
Not every ice melt treats pavers the same. Plain rock salt is the least damaging choice for concrete pavers. Skip magnesium chloride, which can chemically break down concrete. Whatever you use, shovel on a diagonal to the joints so the blade does not catch the paver edges.
Repair or Rebuild
A few lifted pavers on an otherwise solid walk can be lifted, the base corrected, and reset. A walk that moves every single winter is telling you the base was never right, and resetting the same pavers on the same base just buys one more season. The fix is the base.
Fall is the window. Dry ground, stable temperatures, and a finished walk that gets its first winter as a test before anyone trips on it in spring.
The Sun Sets Before Dinner Now. Is Your Yard Ready for It?
By the end of October the sun sets around 5:35 on the Seacoast, and once the clocks go back on November 1 it sets around 4:35. The patio you used every evening in July goes dark before you get home. The front steps you never thought about become a guess in the dark with an armful of groceries. Nothing about the yard changed. The light did.
Where It Matters First
Steps and walkways. Wet leaves, the first frost, and a step you cannot see is how fall injuries happen at home. Low path lights and a fixture at each change in grade are the difference between a walk you think about and one you do not.
The Entry
A lit front door and driveway is the first thing a visitor, a delivery driver, or a neighbor driving past notices. It reads as occupied and cared for. A dark house reads as neither.
The Space You Paid For
A patio or fire pit with no lighting is a summer only feature in New Hampshire. Lit, the same space works into November and comes back in April, before the first warm weekend, instead of after. That is months of use added to something already built.
What It Costs to Run
A modern LED system of 20 to 30 fixtures typically runs for less than a dollar a day, and on a timer or photocell it only runs when it is dark. The upfront install is the cost. The bills are not.
Why Fall Is the Time
Lighting goes in with the ground open and the plantings visible, so fixtures land where they belong instead of where the snow allows. And you get the benefit through the darkest months, not after them.
If the yard already goes dark on you at dinner time, it is only going to get earlier from here.
Fall Is for Planting: Why Trees and Shrubs Go In Best in September and October
Ask anyone when to plant a tree and they will say spring. Ask someone who plants them for a living and they will say fall. Autumn planting is one of the most underused advantages in New England landscaping, and the window is about to open.
Warm Soil, Cool Air
In September the soil is still warm from months of summer, but the air has cooled off. That combination is exactly what a transplant wants: roots grow aggressively in warm soil while the plant is no longer fighting heat stress and water loss up top.
Months of Root Growth Before Summer
A shrub planted in September builds roots all fall, sits dormant through winter, and starts building again in early spring. By the time next summer's heat arrives, it is established. The same shrub planted in May faces its first drought with a root ball the size of its pot.
Less Watering, Less Stress, Less Loss
Fall rain and cool weather do most of the watering for you. Transplant loss rates drop, and the constant hose duty a spring planting demands mostly disappears.
What to Plant Now
Trees, shrubs, evergreens, and perennials all go in beautifully in September and October. It is also the season for spring bulbs: daffodils, tulips, and alliums planted in fall are the first color you see next year.
The One Deadline
Roots need about six weeks in the ground before it freezes, which on the Seacoast means getting plants in by mid-to-late October. Design and plant selection take time, so the projects that make that deadline are the ones planned in August and September.
How We Prep the Ground Before Any Patio Goes In
Most people never see the part of a patio build that actually determines whether it lasts twenty years or five. By the time you walk out and see pavers, the job that matters most is already buried under them.
It Starts With Excavation, Not Pavers
Before anything else goes in, we dig out the area to a depth that accounts for the base, the bedding layer, and the pavers themselves, usually eight to ten inches total in New Hampshire. Skip this step, or shortchange the depth, and you are building a patio on soft native soil that will shift with every freeze and thaw cycle.
The Base Layer Is the Real Foundation
We fill the excavated area with crushed stone in compacted lifts, never dumped in all at once. Each layer gets compacted with a plate compactor before the next one goes down. This is the single most skipped step on DIY and budget jobs, and it is the reason so many patios heave, sink, or separate within a few seasons.
Grade and Drainage Get Solved Before You See a Single Paver
A patio needs a slight slope away from your house, usually about a quarter inch per foot, so water runs off instead of pooling or heading toward your foundation. We set that grade in the base, not after the fact, because there is no fixing drainage once pavers are locked in place.
Then, and Only Then, the Pavers Go In
With a compacted base and correct grade in place, setting pavers is the fast, satisfying part everyone wants to see. It is also the part that only works because of everything that happened before it.
If your patio was installed without this process, or you are planning a new one for next spring, fall is when the ground conditions are best for exactly this kind of prep work.
Granite Steps vs. Concrete Steps: A Straight Comparison for NH Homes
Steps take more abuse than almost anything else on your property. Every winter they get walked on, salted, shoveled, and hit with freeze-thaw cycles that most other hardscape features never see. The material you choose matters more here than almost anywhere else in a landscape.
Concrete Steps Cost Less and Wear Out Faster
Poured or precast concrete steps cost less upfront and can be installed quickly. The tradeoff is that concrete is porous. Water gets into small cracks, freezes, expands, and over a few New Hampshire winters that turns into spalling, chipping, and surface flaking that only gets worse.
Granite Steps Cost More and Are Built for This Climate
Natural granite is dense, non-porous, and essentially immune to the freeze-thaw damage that wears down concrete. A well-set granite step will outlast the house it leads into. The upfront cost is higher, but there is no resurfacing, no patching, and no replacing them again in ten years.
Setting Matters As Much As Material
Even granite steps fail if they are set on an unstable or poorly compacted base, the same principle that governs any patio or walkway build. Steps need to be set level, on a proper compacted base, with attention to consistent rise and run so they are safe to use, not just good-looking.
Which One Is Actually Right for You
If this is a short-term fix or a rental property, concrete steps do the job. If this is your home and you want something you install once, granite is the better long-term investment, especially anywhere that sees regular foot traffic in ice and snow.
Fall is a good time to get steps and walkways scheduled before the ground work gets harder to do.
Fall Cleanup Done Right: What to Cut Back, What to Leave Standing
There are two kinds of fall cleanup. One strips every bed to bare dirt because it looks tidy. The other one is done with next spring in mind. They look similar in November. They look very different in May.
Cut These Back
Anything that showed disease or mildew this year, like peony, bee balm, or phlox with powdery leaves, gets cut and removed so the problem does not overwinter in the bed. Hostas go after frost knocks them down, and iris foliage gets cut to short fans to evict iris borer eggs.
Leave These Standing
Ornamental grasses earn their keep all winter and get cut in early spring. Coneflower and black-eyed Susan seed heads feed the birds. Hollow perennial stems shelter the pollinators you want back next summer. And do not touch mophead hydrangeas at all, next year's flowers are on those stems.
Deal With Leaves the Smart Way
A thin layer of leaves mowed into the lawn feeds it. A thick wet mat smothers it and invites snow mold, so heavy cover needs to come off the turf. In the beds, shredded leaves are free mulch and winter insulation.
The Last Jobs of the Season
Final mow a notch shorter than summer height, edges cleaned, beds topped up with mulch, and everything draining away from the house before the ground freezes. That is the whole list, done in the right order.
Why It Sets Up Spring
A yard cleaned up correctly in fall wakes up ahead: no disease carryover, no smothered turf, no April spent doing November's work. Fall cleanup slots fill fast once the leaves turn, so this is another one worth booking early.
9 Plants That Need Little to No Pruning
Smart plant selection is one of the most underrated decisions in landscape design. Choosing the right plants from the start dramatically reduces maintenance year after year.
Why It Matters
Overly aggressive growers or species not suited to NH soil conditions cost far more than the initial investment. Choosing the right plant for the right place is half the work.
Top Picks for NH Landscapes
Karl Foerster feather reed grass needs almost no pruning beyond one cutback in early spring. Inkberry holly holds its shape naturally and handles wet soils common on the Seacoast. Oakleaf hydrangea is a four season standout that does not need deadheading. Serviceberry provides spring flowers, summer berries, and fall color with virtually no intervention.
Emerald Green arborvitae maintains its tight columnar form naturally. Native inkberry and winterberry hollies offer wildlife value without demanding attention. Japanese pieris rarely needs pruning if given enough space at planting.
The Key: Proper Spacing
Even low maintenance plants require pruning when planted too close together or too close to structures. Give each plant the space it needs to reach its mature size.
Bee Friendly Flowers for Your NH Landscape
Pollinators are a critical part of any healthy landscape, and the NH Seacoast offers a great climate for establishing pollinator friendly plantings that look beautiful from late spring through fall.
Why Pollinators Matter
A landscape with strong pollinator activity is a healthier landscape overall. Bees, butterflies, and other beneficial insects support plant reproduction throughout your property.
Best Choices for the Seacoast
Lavender thrives in the sandy, well drained soils common on the Seacoast and is a top performer for bees and butterflies. Coneflower blooms midsummer and feeds pollinators through fall. Bee balm supports multiple pollinator species. Goldenrod is one of the most valuable late season pollinator plants for NH landscapes.
For early season interest, serviceberry and native viburnums provide critical food sources when pollinators first emerge. Catmint works well along walkway edges and is highly effective for attracting pollinators.
Design for Bloom Succession
The most effective plantings have something in bloom from May through October, providing continuous food sources throughout the growing season.
Best Watering Practices for New Plantings in NH
Getting watering right in the first 6 to 12 weeks makes the difference between plantings that thrive long term and ones that struggle before the first winter.
The First Two Weeks
Water deeply every day or every other day for the first two weeks. Deep watering encourages roots to grow downward rather than staying shallow near the surface.
Weeks Three Through Eight
Pull back to two to three times per week. Continue to water deeply each time. Light, frequent watering trains roots to stay shallow, making plants more vulnerable to heat and drought.
How to Tell If You Are Watering Enough
Push your finger two inches into the soil near the base of the plant. If the soil feels dry at that depth, water. If it still feels moist, hold off. Overwatering is just as damaging as underwatering.
Mulch Helps
A two to three inch layer of mulch retains soil moisture, regulates ground temperature, and reduces how often you need to water. Keep mulch pulled back slightly from plant stems to prevent rot.
How to Maintain Your Paver Patio Through NH Winters
A professionally installed paver patio is built to last through New England winters, but it benefits from a little care going into and coming out of each winter.
Before Winter: Clean and Seal
Remove debris and organic material from between joints. Resand any areas where joint sand has washed out. Sealing your pavers in the fall locks in joint sand, enhances color, and creates a barrier against moisture infiltration. When water cannot penetrate the surface, it cannot freeze and expand inside the material.
During Winter: Pick the Right Ice Melt
Plain rock salt is the least damaging deicer for concrete pavers. Skip magnesium chloride, which can chemically break down concrete. When you shovel or plow, go on a diagonal to the joints so the blade does not catch the paver edges.
Spring Inspection
Look for any pavers that have shifted, heaved, or settled unevenly. Some minor movement is normal in the first year or two. Significant shifting, sinking, or drainage issues should be addressed before summer.
Why Landscape Lighting Adds More Value Than You Think
Most homeowners think of landscape lighting as a luxury. The reality is it is one of the highest return improvements you can make to your property.
It Extends How You Use Your Outdoor Space
A patio or outdoor living area without lighting is essentially unusable at night for half the year in New Hampshire. The right lighting system means your outdoor investment works from April through October instead of just during daylight hours.
Safety and Security
Pathway lighting eliminates trip hazards along walkways and steps. Lighting around driveways and entry points deters unwanted visitors. Some homeowners see reduced insurance premiums with documented exterior lighting improvements.
Property Value
Real estate professionals consistently list outdoor lighting among the improvements that return the most at sale. A home that photographs well at night stands out in listings. In the NH Seacoast market, curb appeal matters.
Low Operating Cost
Modern LED landscape lighting typically costs less than a dollar a day for a full 20 to 30 fixture system. Paired with a smart timer or photocell, the system runs only when needed.
White Clover as Living Mulch: What It Does and What It Does Not Do
White clover planted between vegetable rows or landscape beds gets marketed as a free solution to weeding, fertilizing, and water retention. Some of that is true. Some of it is not. Here is what you are actually getting.
What It Actually Does Well
White clover fixes nitrogen, but most of it stays locked in the plant tissue while it is alive. You get the nitrogen release when the clover decomposes, not before. It does suppress weeds effectively once it fills in, and it creates real pollinator habitat when it blooms. For larger beds with room to manage it, it earns its place.
Where It Falls Short
Clover competes for water. It needs 1 to 2 inches per week and does not reduce total water use the way some people expect. In drought-prone or unirrigated gardens it can stress out neighboring plants rather than help them. It also creates conditions that favor slugs and voles, so if you already have pressure from either, clover makes it worse.
Works Well For
Transplanted vegetables like tomatoes, peppers, and brassicas do well alongside white clover. Larger beds with irrigation and no slug or vole pressure are good candidates. It is a solid choice when you have the space to manage it properly.
Avoid or Use Carefully For
Direct-seeded small crops like carrots and lettuce will struggle with the competition. Small intensive raised beds are too tight for clover to work without crowding out what you planted. Drought-prone unirrigated gardens will see more competition than benefit.
Drought-Tolerant Garden Design That Actually Works in New Hampshire
NH summers have become drier and longer. Beds that relied on regular rainfall are struggling more than they used to. These plants are selected specifically for the Seacoast region and hold up without constant intervention.
Russian Sage
Silvery stems and lavender-blue flowers from midsummer through fall. Russian Sage is drought tolerant once established, deer resistant, and thrives in the well-drained soils common in sandy coastal NH yards. It pairs naturally with stone hardscape and does not need much attention after the first season.
Lavender
Needs good drainage and full sun, both of which are easy to achieve in raised beds or sloped sites. Once established it survives dry stretches without irrigation. It also brings in pollinators and holds structure through winter with a hard cutback each spring.
Agastache
A high-performing drought-tolerant perennial that blooms heavily in mid to late summer. Hummingbirds and bees are drawn to it. It handles heat and dry spells better than most perennials and comes back reliably in Zone 6 NH conditions.
Gaillardia (Blanket Flower)
One of the longest-blooming perennials available, running from early summer through frost. It thrives in poor, dry soil and actually performs worse when overwatered. A good choice for sunny slopes or gravelly areas where other plants struggle.
Blue Fescue and Ornamental Grasses
Low-maintenance and drought tolerant once established. Blue Fescue stays compact and tidy at the front of a bed. Taller grasses like Karl Foerster provide movement and structure through the winter months without needing supplemental water after the first season.
How to Divide Perennials and Get More Plants for Free
Most perennials benefit from being divided every few years. They fill in faster, bloom better, and stay healthier when split at the right time. Here is how to do it correctly for three of the most common plants in NH landscapes.
Hosta: Drive a Spade Through the Center
Wait until early spring when shoots are 3 to 4 inches tall. Drive a sharp spade straight down through the center of the clump and pull the halves apart. Each division needs at least 3 eyes to become a full plant by August. Do not wait until the leaves are fully out or you risk damaging the foliage.
Daylily: Pull Apart by Hand
Daylily clumps are made up of individual fans that separate naturally. Dig the whole clump, then pull the fans apart by hand the way you would tear a phone book. Each fan becomes one flowering plant. Divide in spring or fall, never during bloom. The roots separate cleanly without cutting in most cases.
Ornamental Grass: Two Forks Back to Back
Ornamental grasses develop a tough, woody root mass over time. Cut the old foliage back to 2 to 3 inches first. Then drive two garden forks into the clump back to back and lever them apart. It takes some force but splits cleanly once you get the forks in the right position. Divide in spring when new growth is 2 to 3 inches tall.
Timing Matters
Spring division works for all three. Fall works for Hostas and Daylilies but not for grasses. The key rule for all of them is to divide before or after bloom, never during. Dividing at the wrong time sets the plant back by a full season.
9 Plants That Thrive on the North Side of Your House
The north side of a house gets 0 to 2 hours of direct sun on a good day. Most homeowners either ignore it or fill it with mulch and call it done. These plants actually belong there and will reward you for it.
Hosta
The go-to for shaded beds in New England for good reason. Hostas come in dozens of sizes and leaf colors, they fill in fast, and they look their best in full shade. Divide them every few years and you end up with more plants, not fewer.
Astilbe
One of the few perennials that blooms reliably in deep shade. Feathery plumes in white, pink, and red from midsummer into fall. Works well planted in groups along a shaded foundation or woodland edge.
Bleeding Heart
A classic NH shade garden plant. It loves the cool, sheltered conditions on the north side of a house and blooms in spring before most other perennials get going. It goes dormant in summer, so pair it with hostas or ferns to fill the gap.
Japanese Painted Fern
Silver and green foliage that catches whatever light is available and reflects it back. One of the most ornamental ferns available and perfectly suited for Zone 6 in NH. It spreads slowly and fills in over time without becoming aggressive.
Coral Bells (Heuchera)
Grown for foliage more than flowers, Coral Bells offer year-round color in burgundy, caramel, lime, and silver. They handle shade well and hold their look from spring through hard frost. A reliable choice for the front of a shaded bed.
Brunnera
Heart-shaped leaves with silver markings that light up dark corners. Small blue flowers in spring. Brunnera is one of those plants that looks like it should be delicate but is actually quite tough once established in NH conditions.
Solomon's Seal
An arching native perennial with clean, architectural form. It naturalizes in the deepest shade and spreads gradually to fill space. Works well along a foundation or under trees where other plants struggle to take hold.
Ligularia
Bold, dramatic foliage with tall yellow flower spikes in late summer. Ligularia needs consistent moisture, so it works best on the north side where the soil stays cooler and does not dry out as fast. Plant it where you want a statement.
Wild Ginger
A low-growing native groundcover that handles deep shade and suppresses weeds once it fills in. It spreads slowly but once established it stays put and requires almost no maintenance. A good solution for shaded areas under trees or along foundations where nothing else wants to grow.
Building a Low-Maintenance Deer-Resistant Garden in New Hampshire
Deer are a genuine problem across the NH Seacoast and inland towns alike. If you have planted a bed only to watch it get browsed down to stubs, the answer is not a fence around everything. It is choosing plants deer consistently avoid from the start.
Russian Sage
Deer rarely touch it. The silvery stems and lavender-blue flowers provide color from midsummer through fall, and it handles drought and poor soil without complaint. Pairs well with stone hardscape and looks good planted in mass along a retaining wall or bed edge.
Lavender
The fragrance that attracts people repels deer. Lavender thrives in well-drained soil with full sun, which makes it a good fit for raised beds or slopes that dry out quickly. It also brings in pollinators and holds its structure through winter with a hard cutback in spring.
Salvia
A reliable deer-resistant perennial that blooms heavily in early summer and often again in fall. Purple spikes over dark green foliage. Low maintenance once established and works well in front of taller plants like Russian Sage or ornamental grasses.
Yarrow
One of the toughest perennials for NH landscapes. Deer avoid it, it tolerates dry soils, and it blooms in yellow, red, pink, and white depending on the variety. It spreads over time to fill space, which is a feature rather than a problem in larger beds.
Catmint
A lower-growing blue-flowered perennial that deer consistently skip. It spills over walkway edges and retaining walls in a way that looks intentional. Cut it back after the first flush of bloom and it comes back for a second round in late summer.
Rudbeckia (Black-Eyed Susan)
A New England native that deer tend to leave alone. It blooms from midsummer through fall, self-seeds to fill gaps, and handles dry conditions well. One of the best low-maintenance choices for a sunny bed that needs consistent late-season color.
Lamb's Ear
Soft silver foliage that deer avoid due to the texture. It works as a low-growing edging plant or groundcover along the front of a bed. Spreads gradually and requires almost no care once established.
A Note on Deer-Resistant vs Deer-Proof
No plant is completely deer-proof when a herd is hungry enough. The goal is to build a planting plan where most of the bed is filled with species deer consistently pass over. A few high-value plants, like ornamental grasses or specific shrubs, can be placed toward the center or back where they are less accessible.
Poison Ivy, Poison Oak, and Poison Sumac: What Every NH Yard Owner Should Know
All three of these plants cause the same allergic reaction from a compound called urushiol, and all three show up regularly in NH Seacoast yards, especially along tree lines, near wetlands, and in beds that have not been cleared in a season or two. Knowing which plant is which before you start pulling weeds or clearing brush is the easiest way to avoid a miserable week.
Poison Ivy
Poison ivy grows almost everywhere on the Seacoast, on the ground, up tree trunks, and through shrubs. The leaves grow in groups of three with pointed tips, and the old saying holds up. Leaves of three, let it be. Vines climbing a tree trunk often have small hairy roots running the length of the vine, which is a good way to spot it even in winter.
Poison Oak
Poison oak is less common in New Hampshire than ivy but still shows up in drier, rocky areas and along the edges of wooded lots. The leaflets are rounded and lobed, closer to an actual oak leaf than the pointed leaves of poison ivy, and it tends to grow low in shrubs rather than climbing.
Poison Sumac
Poison sumac is the one homeowners are least prepared for, mostly because it only grows in standing water. Swamps, marshes, and the wet low spots at the back of a property are where you will find it, and it is the most potent of the three. If a section of your yard never fully dries out, that is exactly where to be careful before you start clearing it by hand.
Before You Clear Anything
Never burn any of these plants. The smoke carries the same oil that causes the rash, and breathing it in is far more serious than touching it. Wear gloves, long sleeves, and dedicate a set of tools to the job so the oil does not transfer to something else later. If you do make contact, wash the area with soap and cold water right away. Warm water opens pores and can spread the oil further.
How Poor Drainage Damages Your Landscape and Foundation
Water that does not have anywhere to go does not just sit there quietly. It moves through soil, along foundations, and under hardscape, and over time it causes real damage. After a heavy rain like the ones we saw this week, poor drainage stops being a minor annoyance and starts being the reason for cracked foundations, dead lawns, and patios that shift.
What Standing Water Actually Does
Water pooling against a foundation puts constant pressure on the walls below grade. Over seasons that pressure works its way into hairline cracks and makes them bigger. Saturated soil under a patio or walkway loses its ability to support the base, which is why pavers that were level last year start to dip or heave. Grass roots that sit in water instead of draining through it die back, leaving bare patches that come back every spring no matter how much seed goes down.
Warning Signs to Watch For
Water sitting in the yard more than a day after rain is the clearest sign. So is a musty smell in a basement or crawl space, staining on foundation walls, and mulch or soil that washes out of beds every time it storms. Mosquitoes breeding in the same low spot every summer is also a drainage problem wearing a different name.
Where Poor Drainage Usually Starts
Most of the drainage problems we see on the Seacoast come down to one of three things. Grading that slopes toward the house instead of away from it, gutters that dump water at the foundation instead of carrying it out, or a yard that was never graded at all when the house was built. None of these show up on a sunny day. They only show up when it rains, which is exactly why so many homeowners do not find out until the damage is already done.
How We Handle It
Every project we build starts with grading and drainage, not as an add on but as the first step. That means French drains where water needs a path out, proper grade away from the foundation, and a base built to handle water instead of holding onto it. A patio or retaining wall is only as good as what is underneath it, and what is underneath it starts with where the water goes.
When and How to Prune Lavender: The Right Cut for Healthy Blooms
Lavender is one of the more forgiving plants in a New Hampshire landscape bed, right up until it gets pruned wrong. Cut it at the right time and in the right spot and it comes back fuller every year. Cut into the wrong part of the plant and that section is gone for good. Late June into July, right after the first bloom fades, is exactly when Seacoast homeowners should be looking at their lavender.
When to Prune
The first and biggest prune happens after the first bloom, June into July on the Seacoast. Cutting back the spent flowers now encourages a second bloom and keeps the plant's shape tight instead of leggy. A lighter pass in April or May is just cleanup, removing anything dead or damaged from winter. One final shaping prune in September gets the plant ready for the cold, and after that point cutting stops until spring.
How to Cut It
Cut back about a third of the plant's green growth, always just above a set of leaves. That is the part of the stem that will push out new growth. Done right, the plant keeps a rounded, compact shape that promotes airflow and more blooms next season.
The One Cut That Kills It
Never cut into the brown, woody part of the stem. Lavender does not regrow from old wood the way a lot of shrubs do, so a cut into brown stems leaves a bare, dead-looking gap that will not fill back in. If you are not sure where green growth ends and old wood begins, cut higher than you think you need to. A plant that gets pruned too lightly bounces back fine next season. A plant cut into old wood does not.